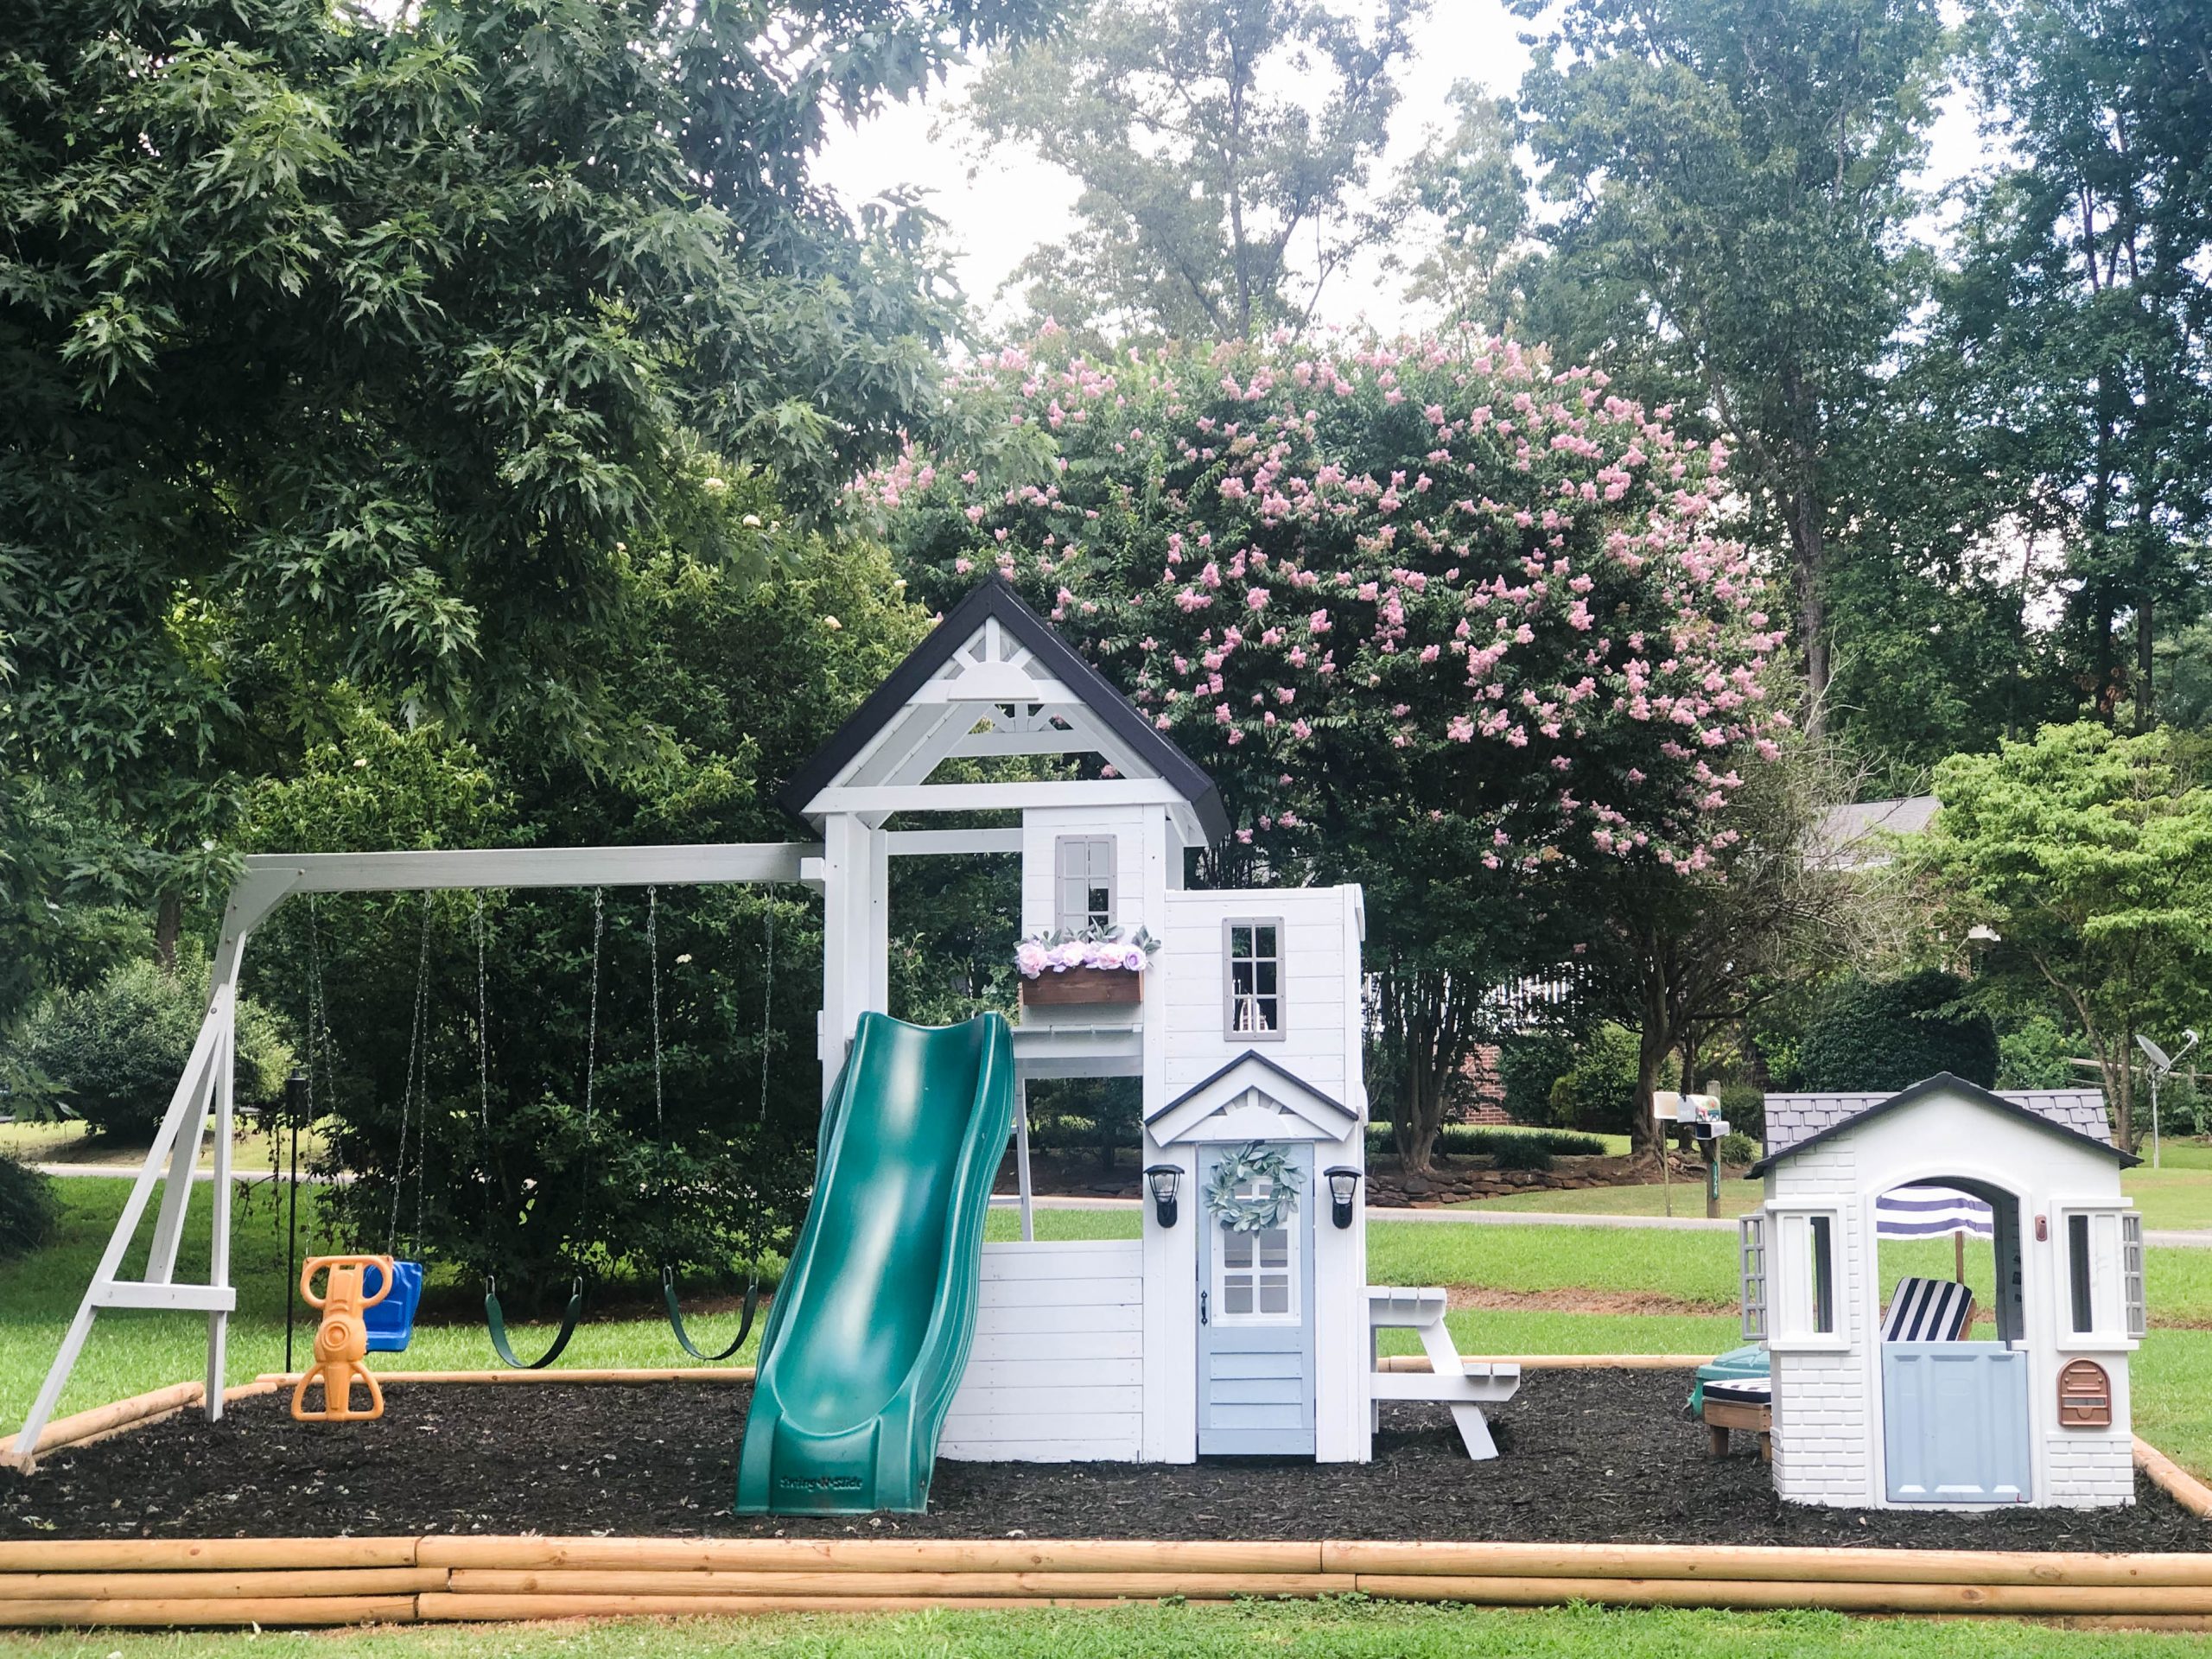
Playhouse Makeover
Before Christmas 2019, Baker started asking for a “swing set” from Santa. At the time, she was terrified of swinging so we knew what she really meant was a playset with a slide. We already had her big gift so decided to hold off until her birthday since you could find them used all over Facebook.
Then quarantine hit.
By the end of March, I had suspicions that we wouldn’t be returning to school and knew I needed something else to help us entertain Baker outside other than her water table. So I started looking for a used playset but couldn’t find a decent one for a reasonable price anywhere and many companies had already shut down due to COVID. After searching for weeks, I finally found a playset in our budget but it needed a good bit of work. However, the swings and slide were in great condition and worth the price we paid for the whole playset. Immediately, I set out looking for playhouse makeover ideas on Pinterest and decided I wanted to make it match the smaller playhouse makeover we did awhile back but never found.
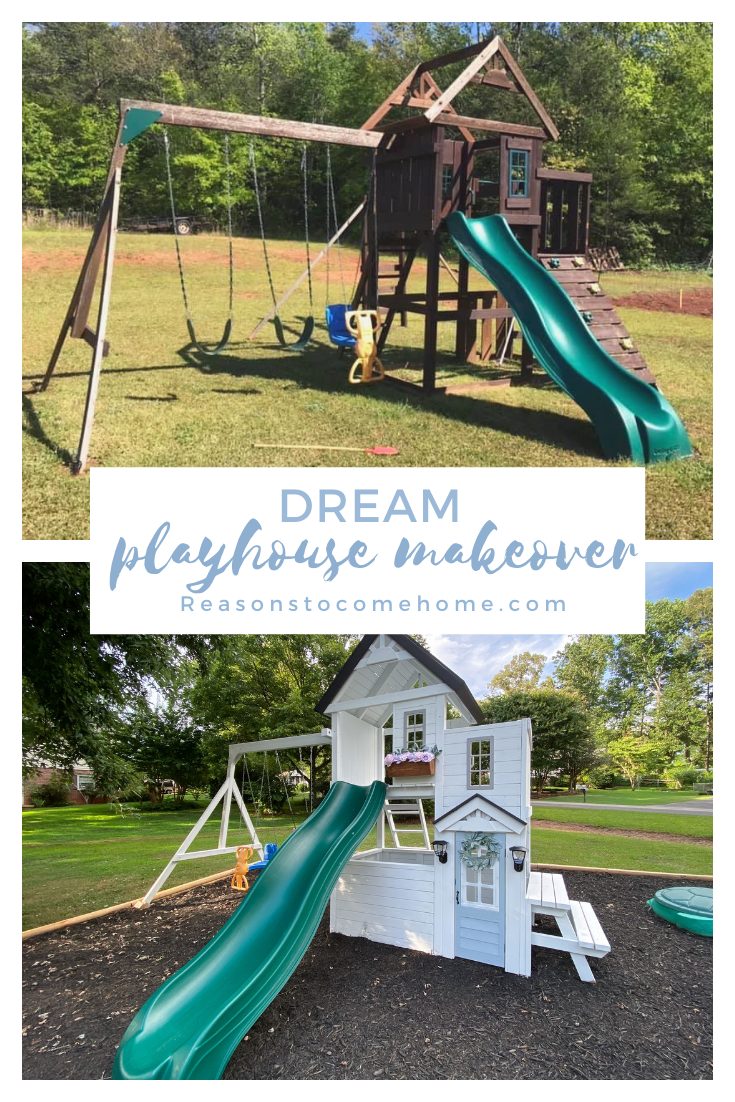
So here’s what we started with. This was the playset still set up at the last owner’s home.
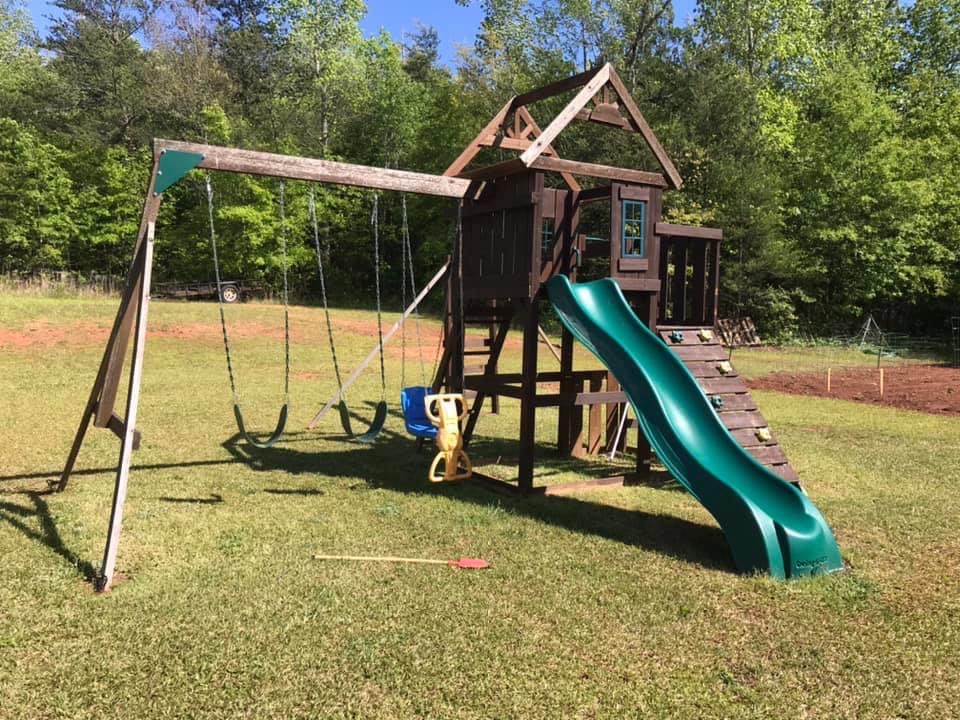
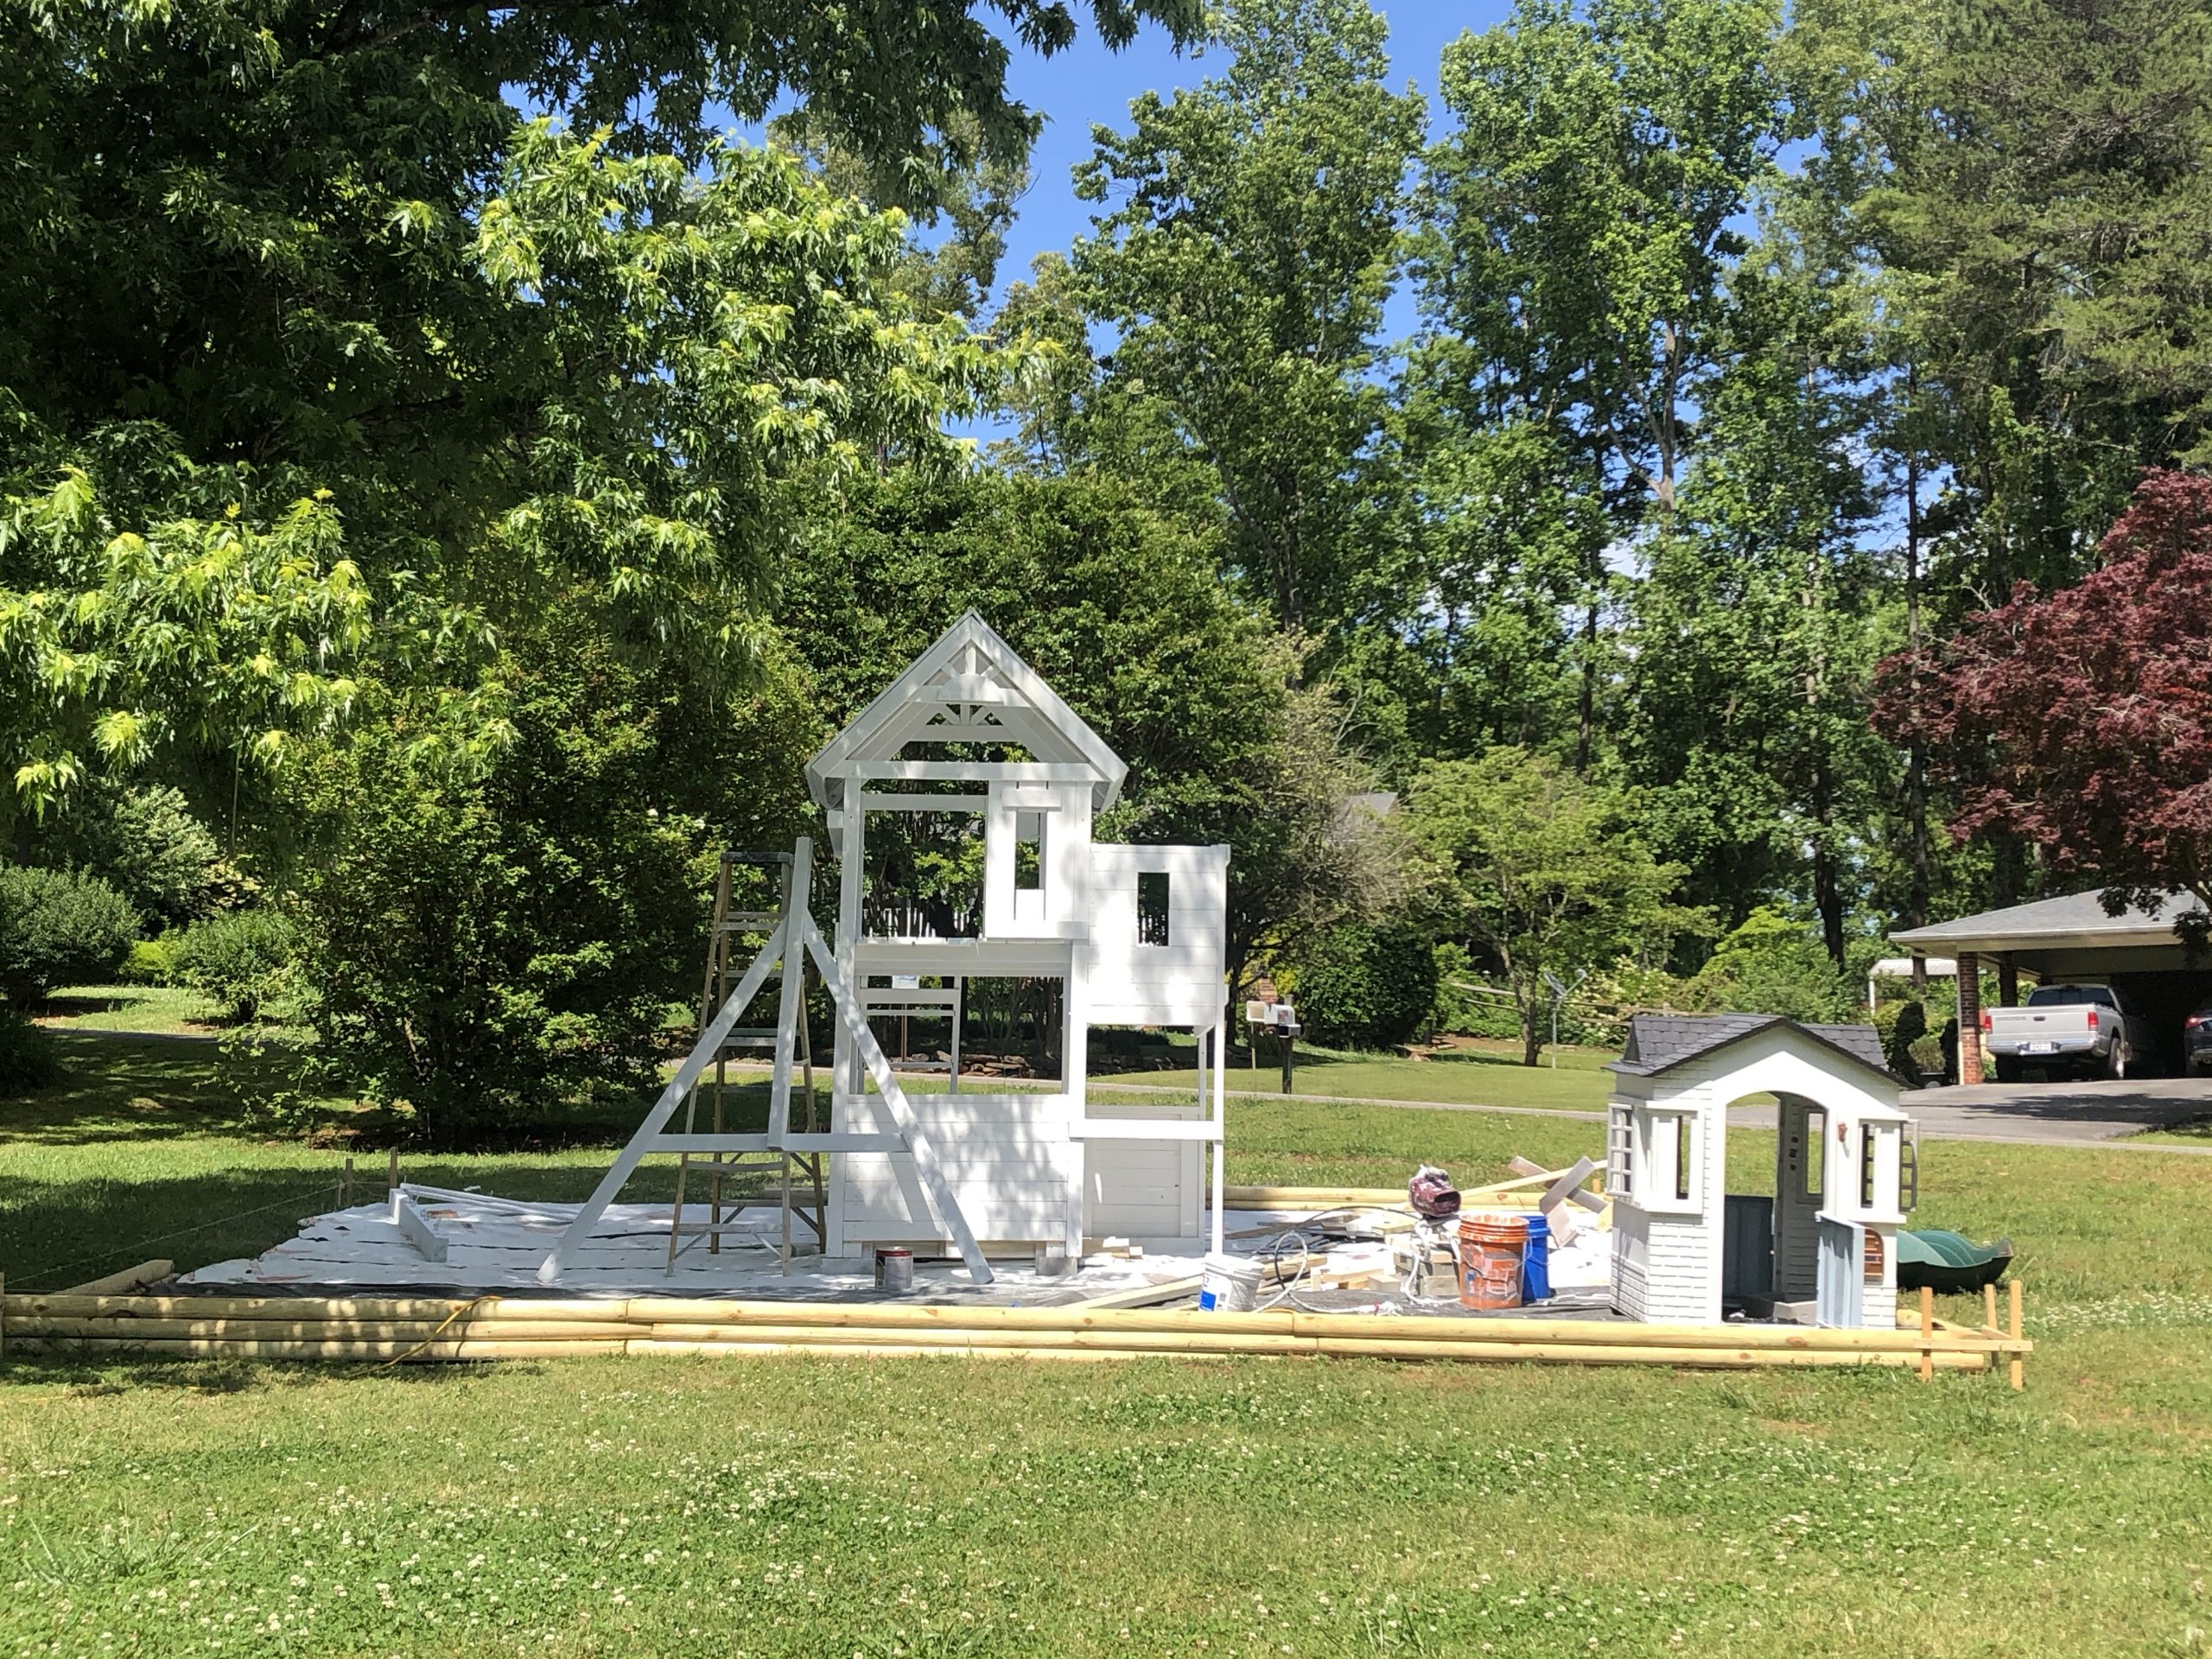
It obviously needed some kind of roof and other than some of the boards needing replaced, we thought it looked to be in pretty good shape. Once we got it home, we realized it needed a little more work than we originally thought. By the time we were done, I would say that we probably 80% of playset was new wood. Cory was in the middle of outage when we picked it up so unfortunately, it had to sit for a week or so. During that time, he replaced a few boards with ones he had at the house.
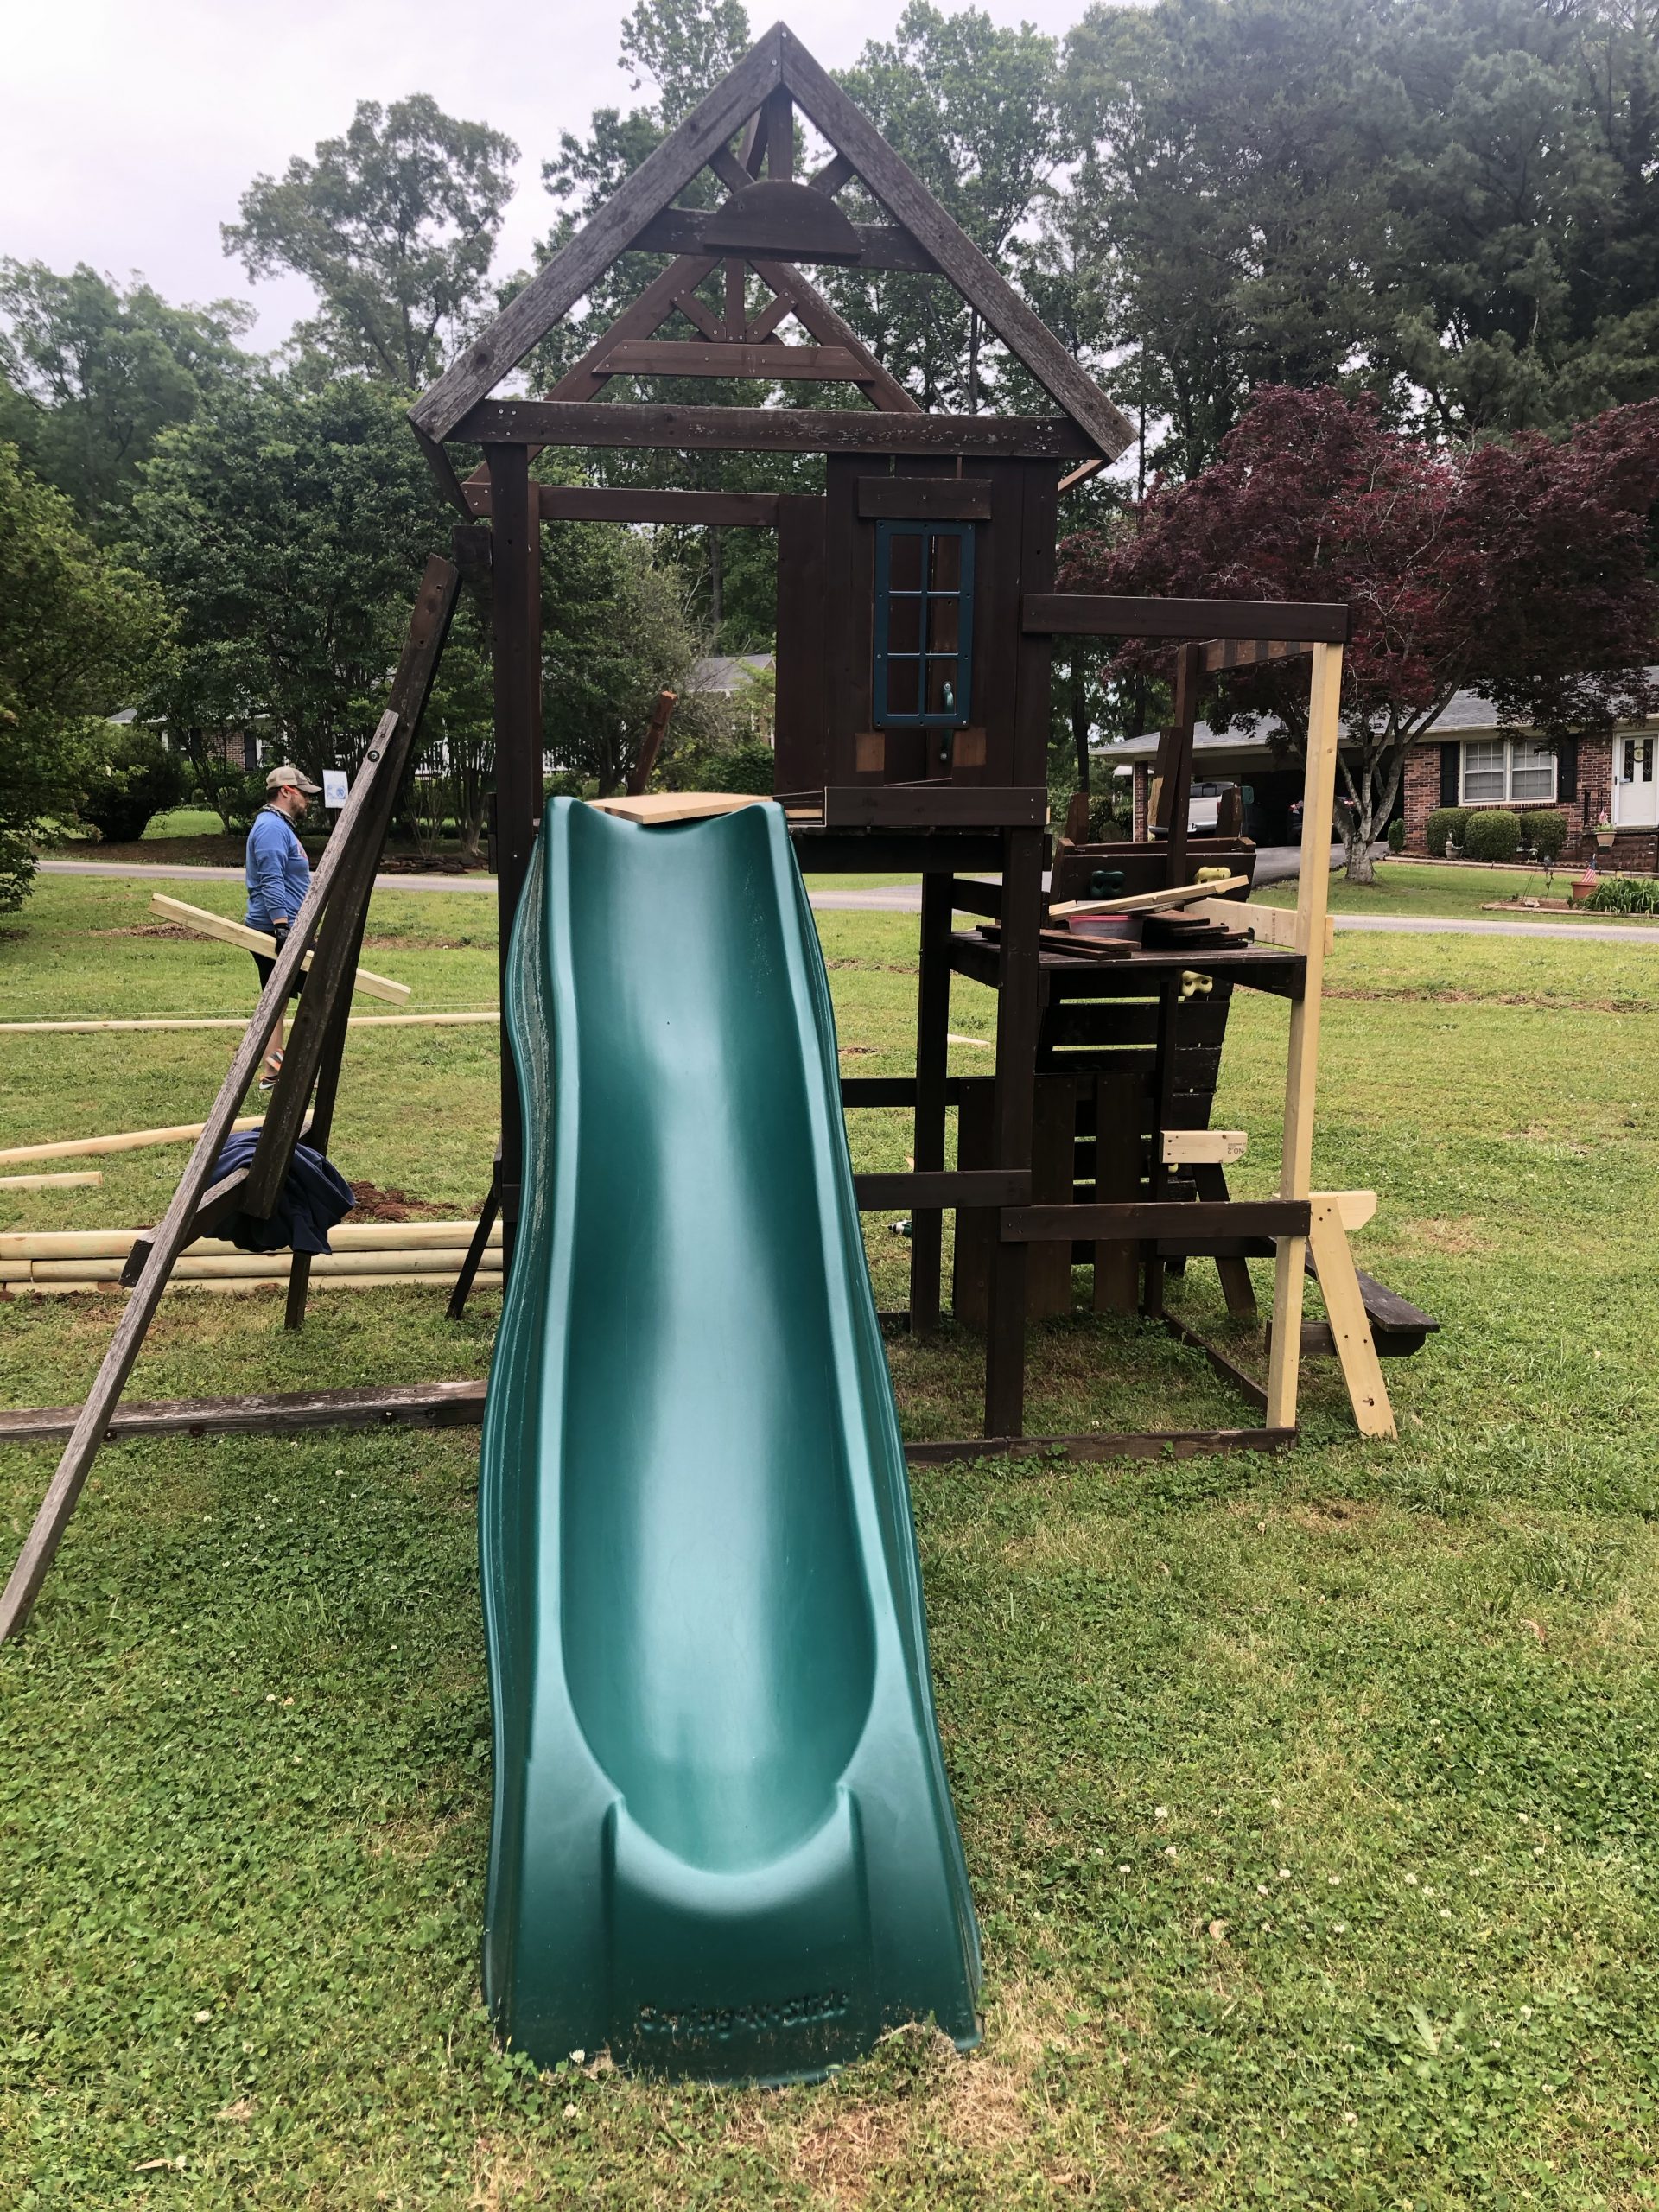
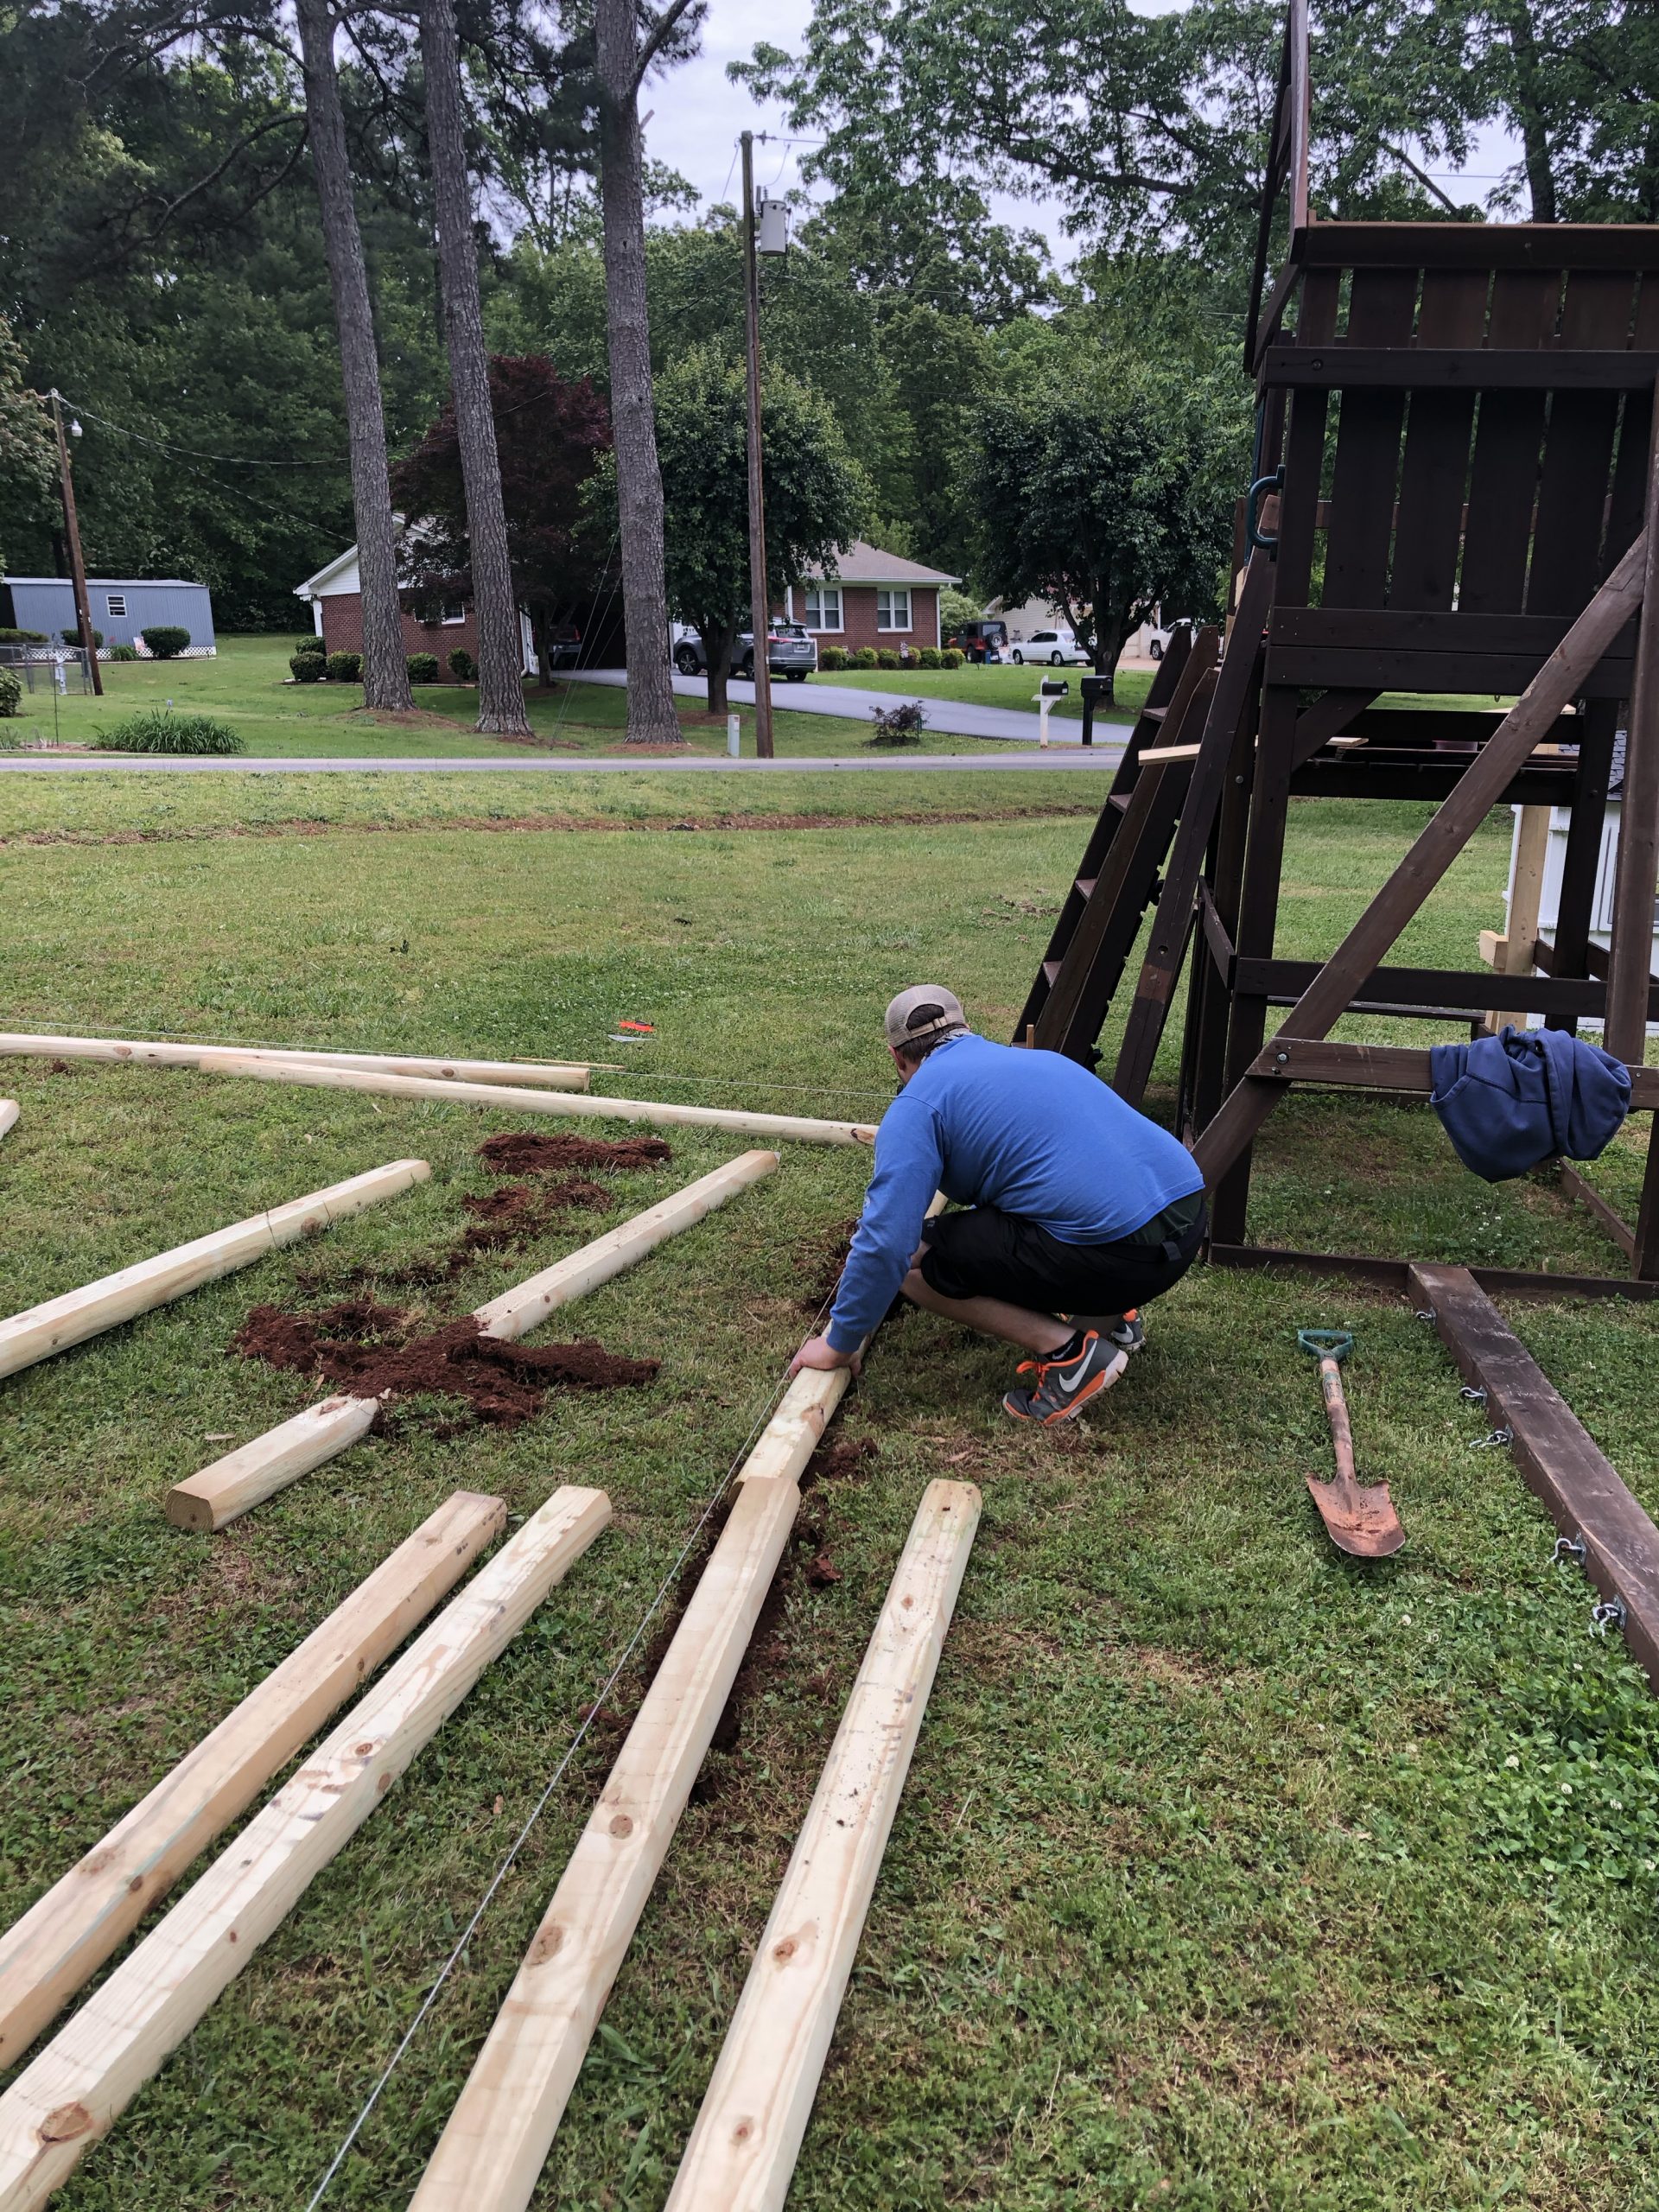
Once Cory finished outage, we got to work that next day creating her play area (a flat area for the playhouse to sit). We faced every challenge you can think of…rain, not enough landscape timbers and everywhere being sold out of them, and I’m sure there’s more that I can’t remember. We were able to get the area mostly level with mud (that we spread in the rain) so we were able to start working on the playhouse makeover.
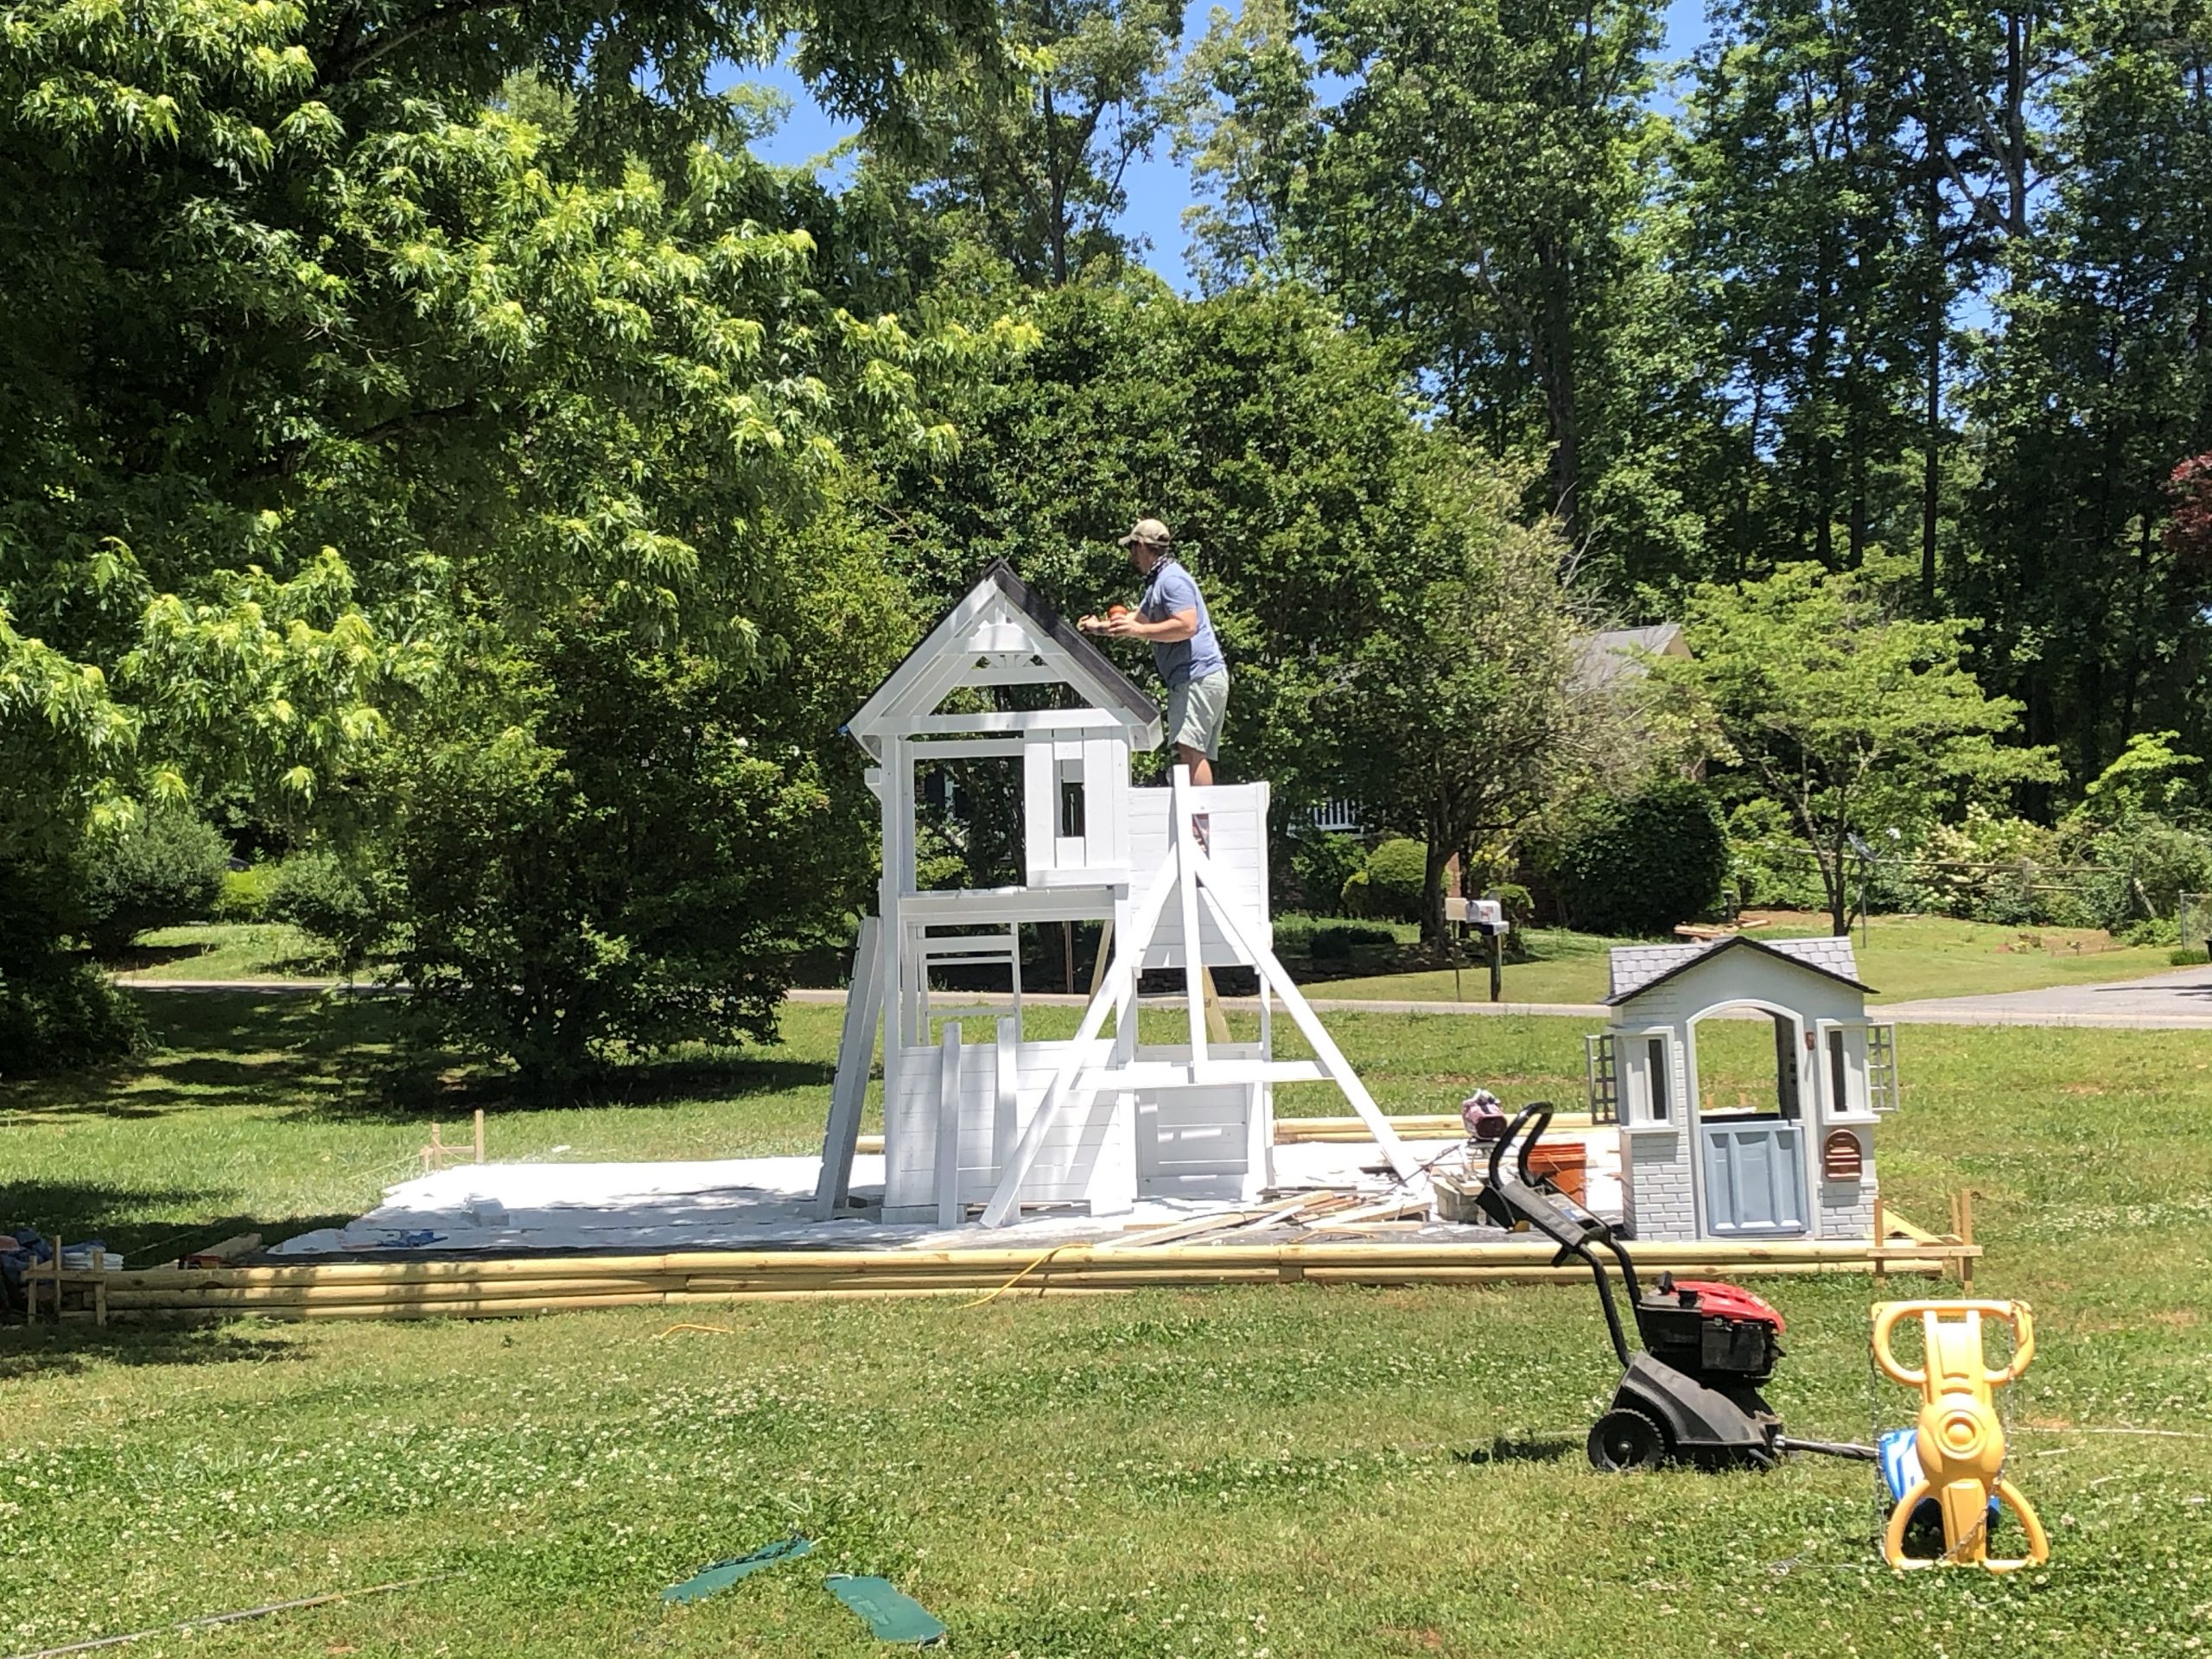
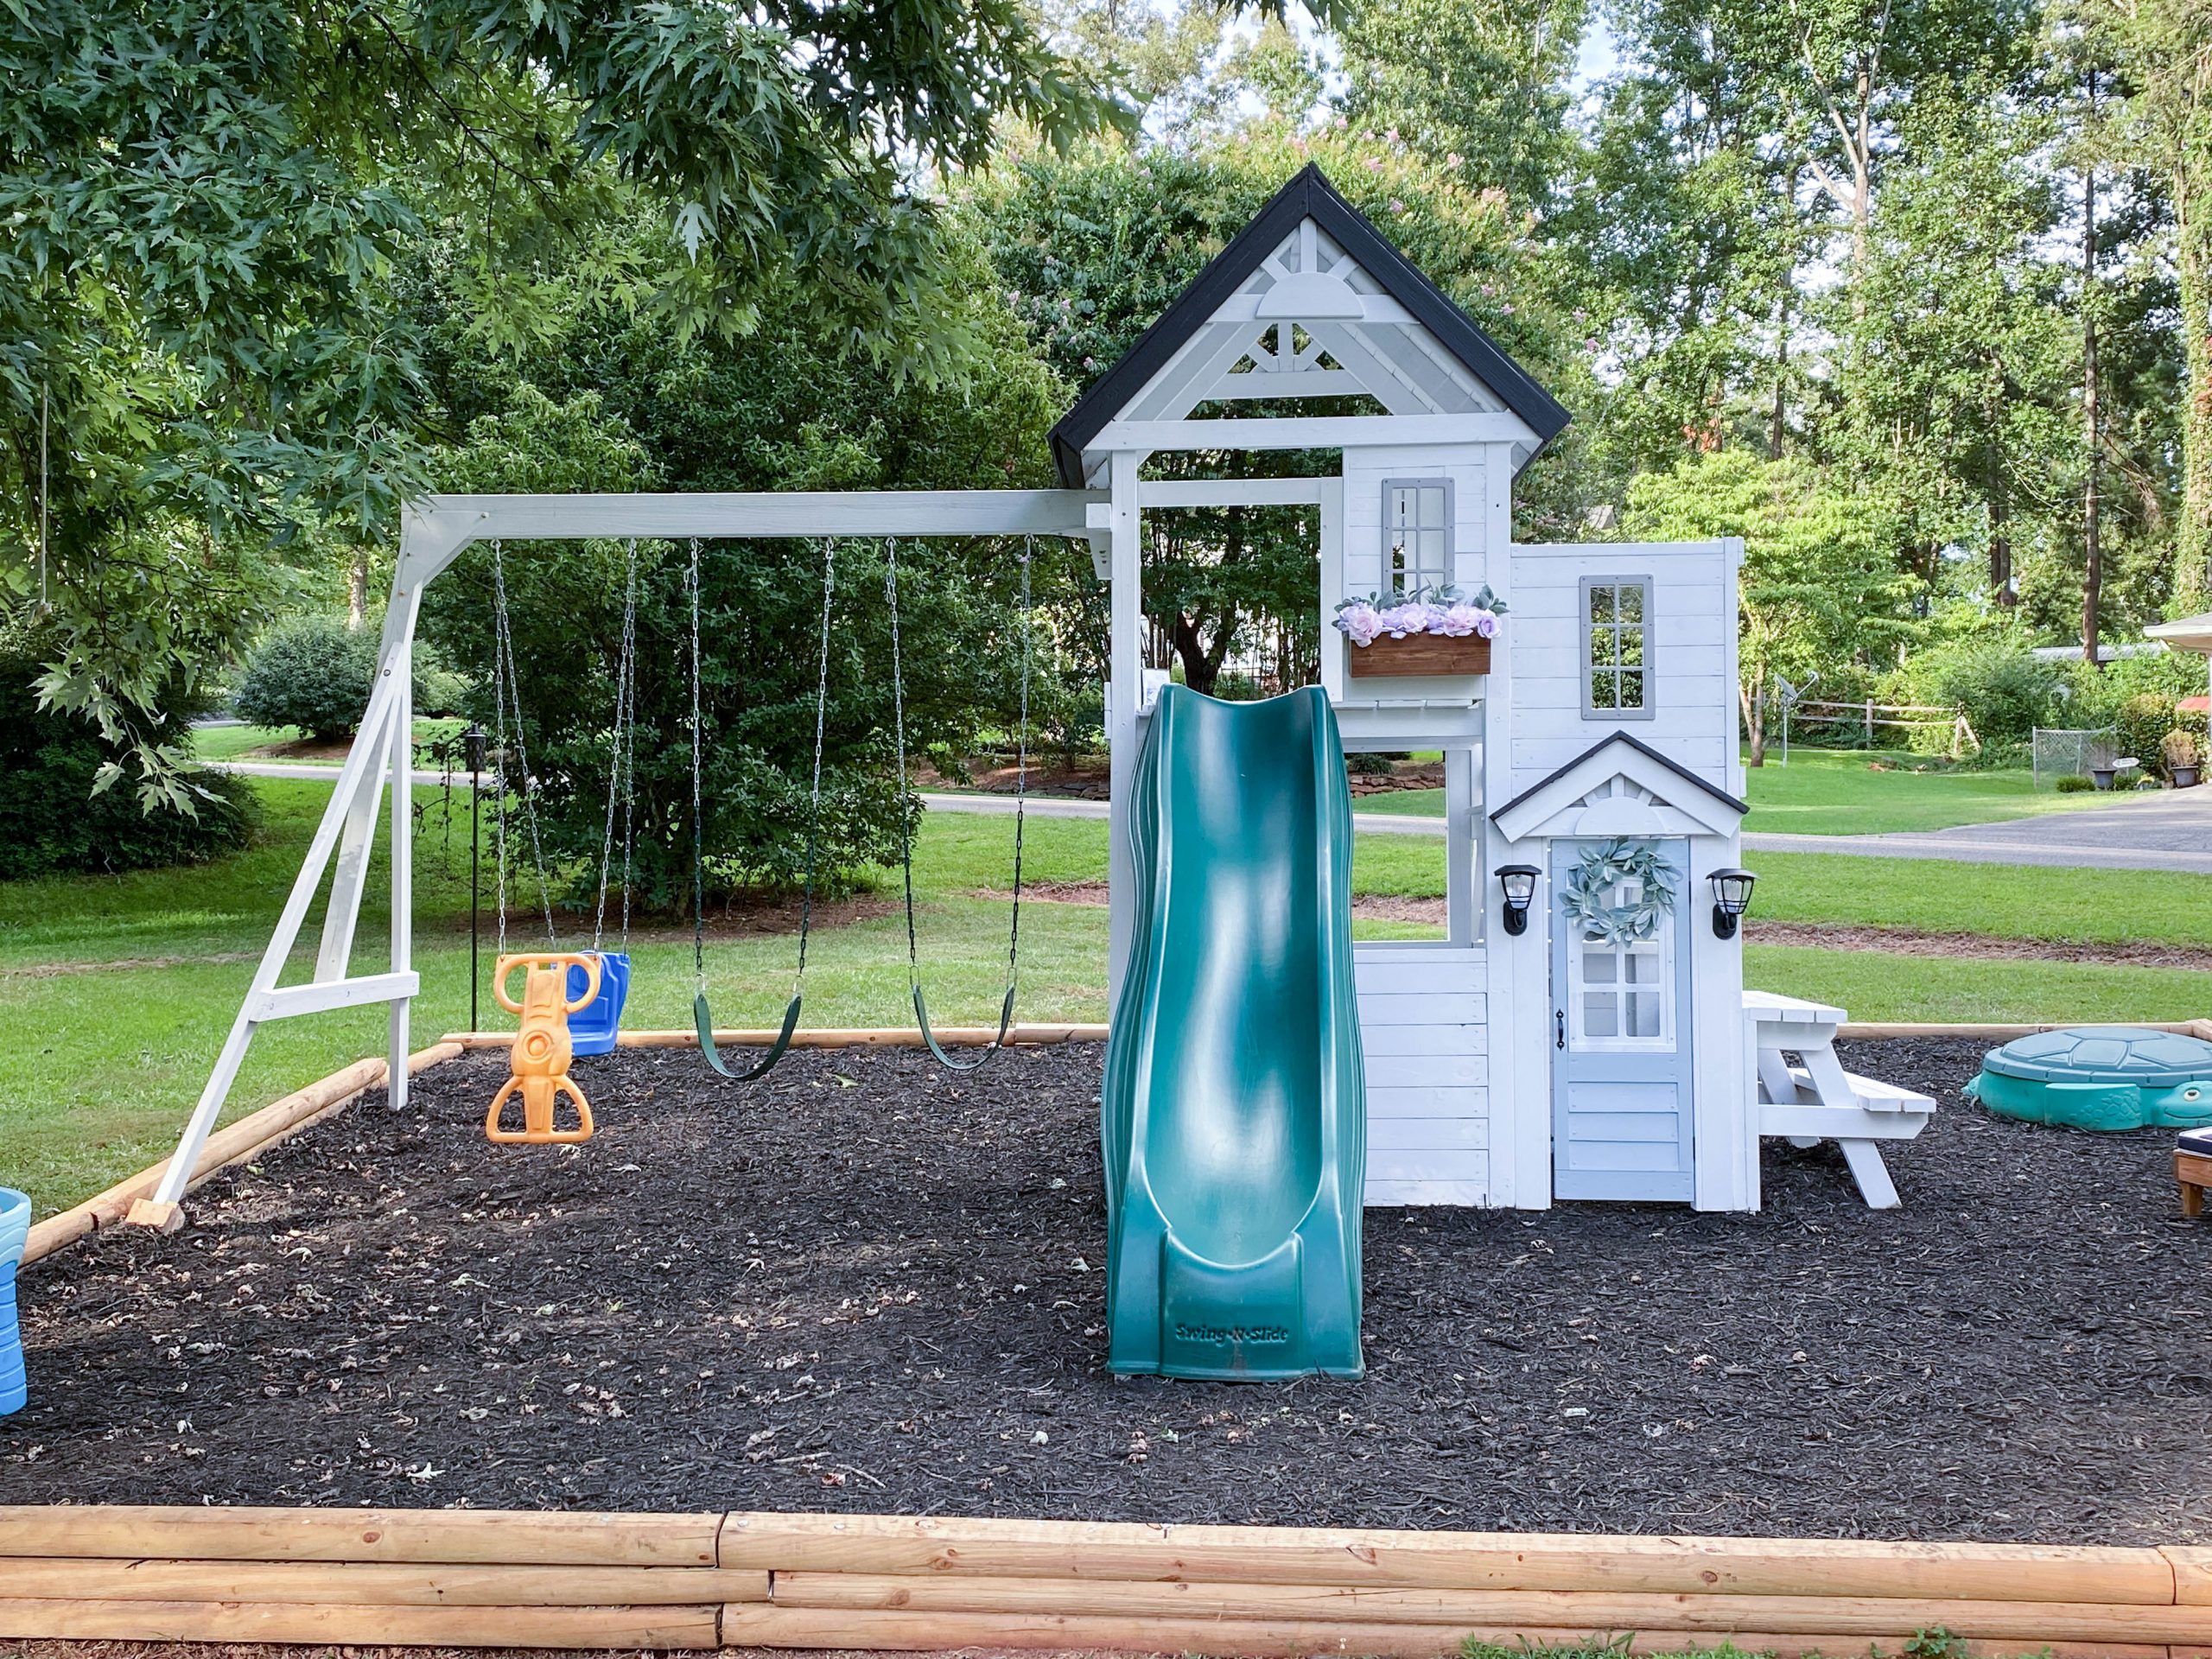
The first weekend, we were able to get the bottom closed in, the first level closed in, a new roof put on, and primer started which was sprayed with a paint sprayer.
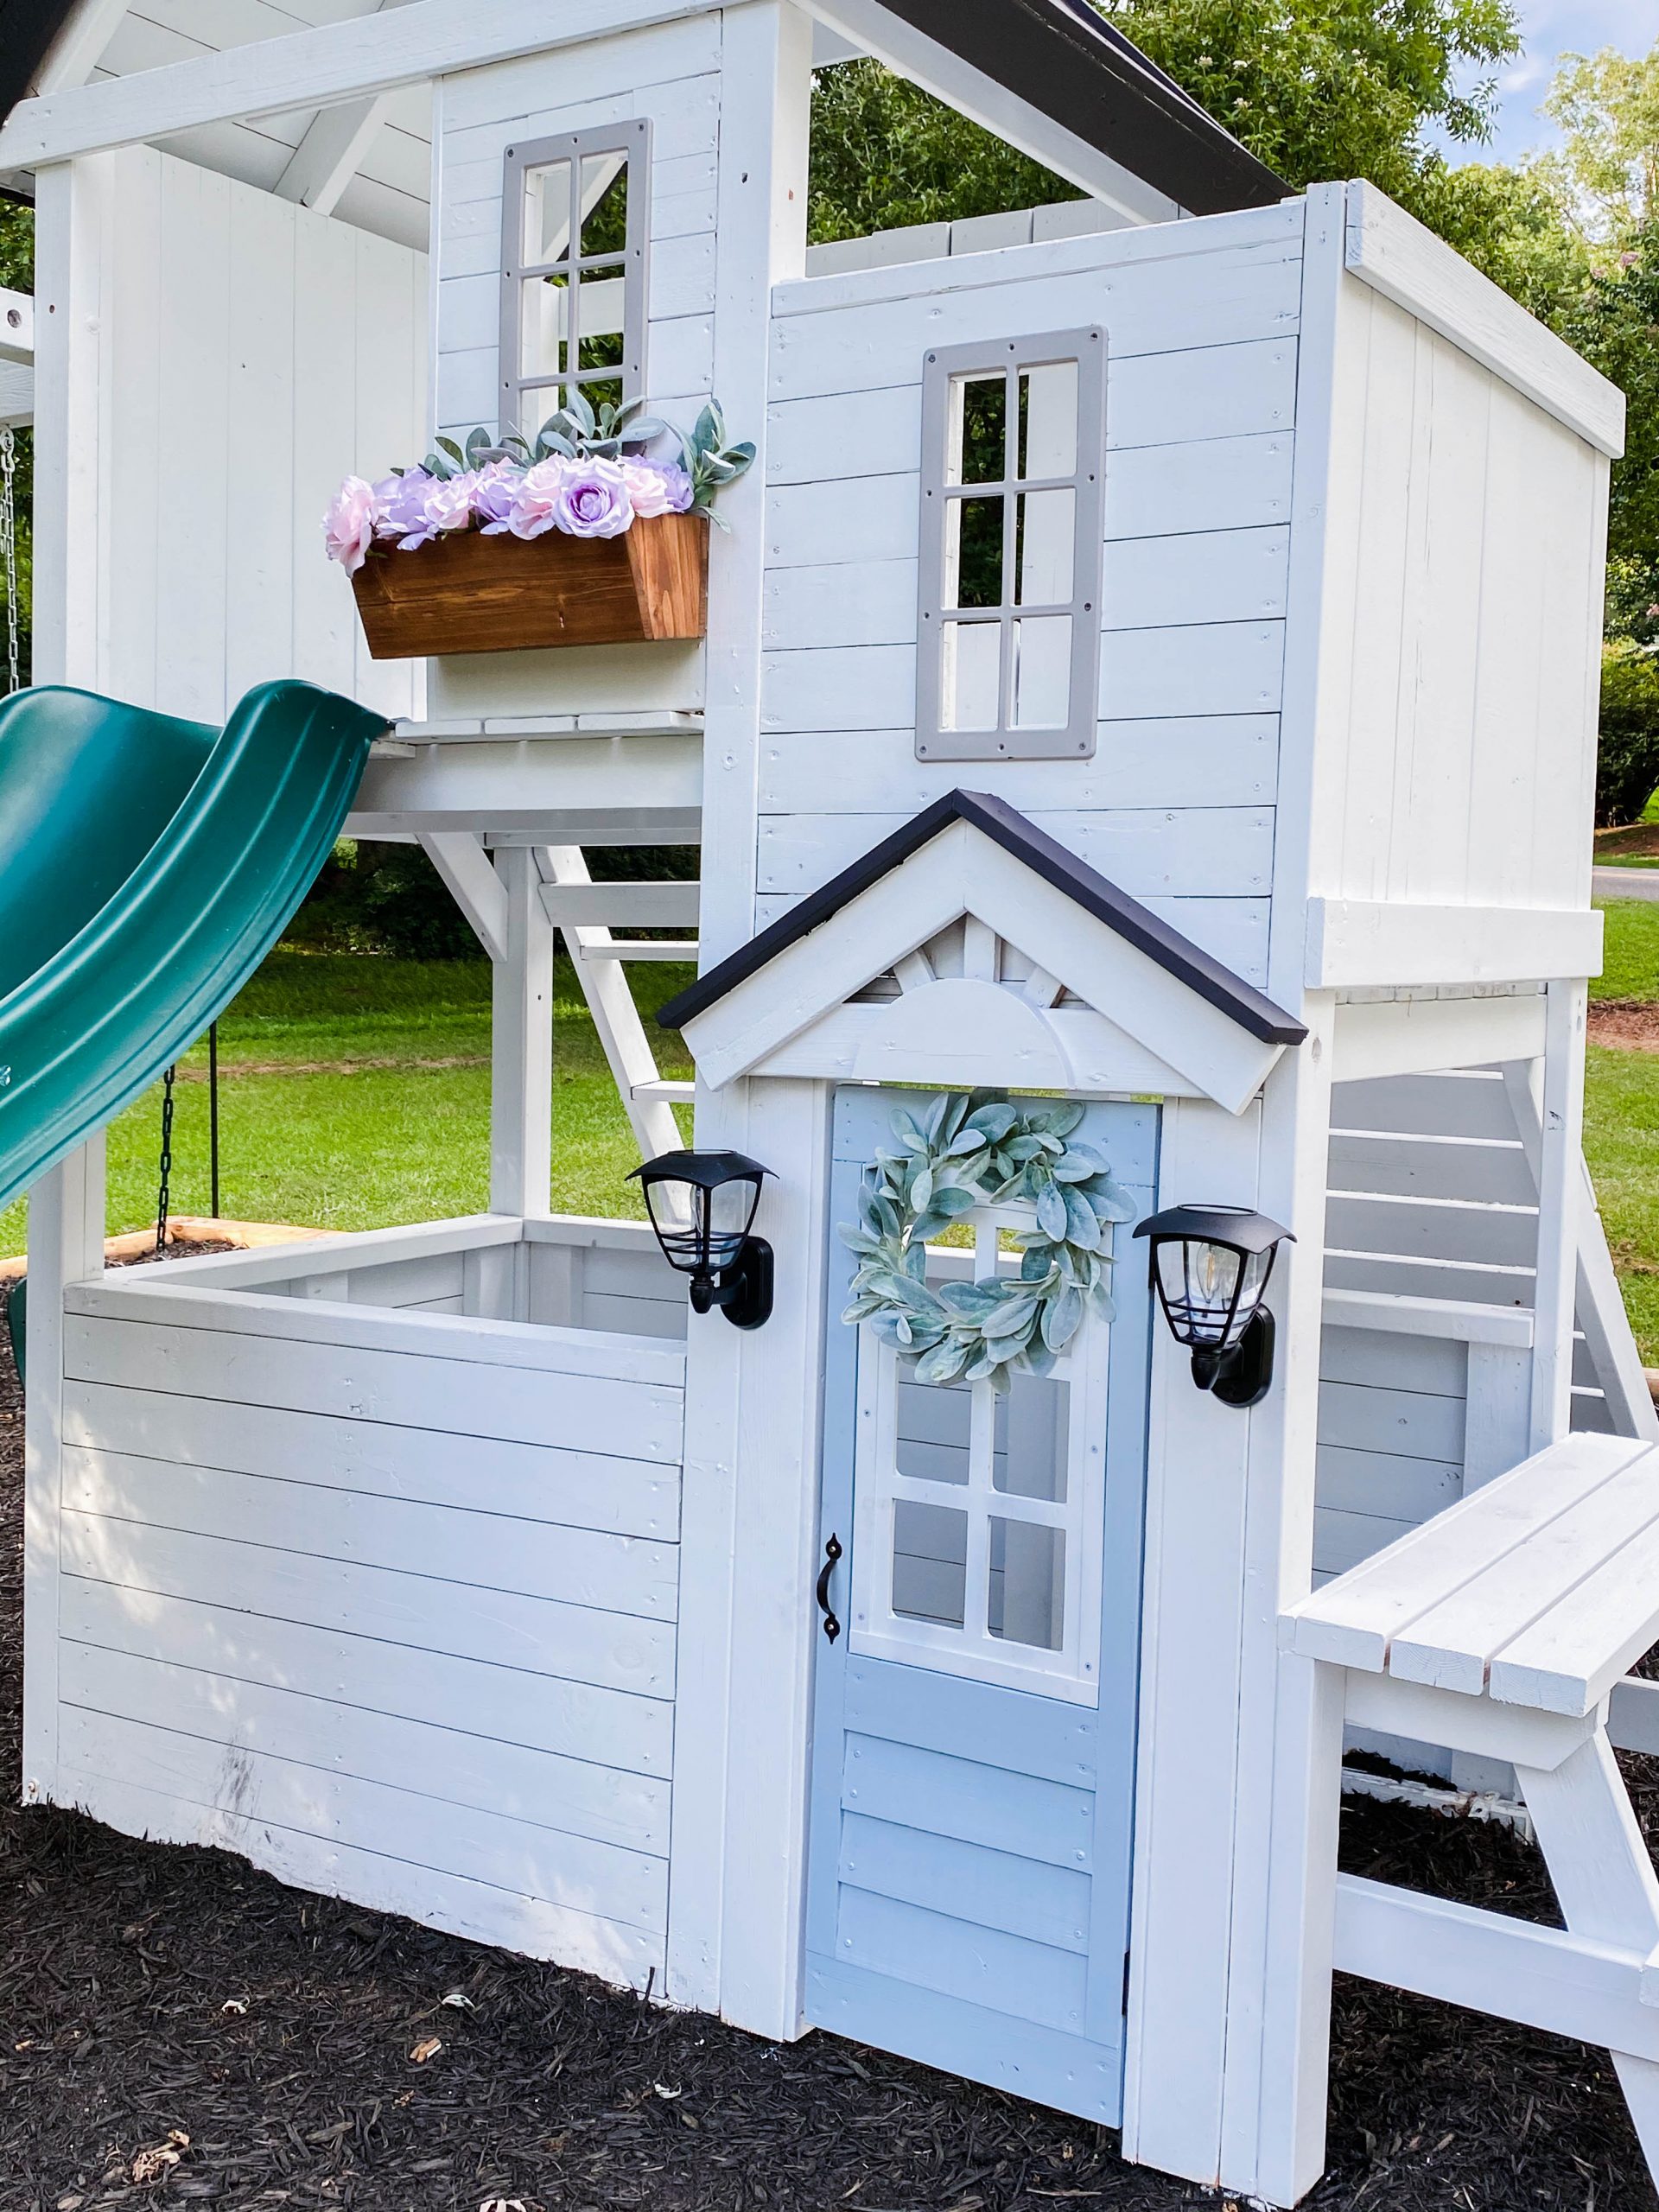
Cory worked every evening that week to finish the paint. I tried my hardest to match the paint colors of her small playhouse which was spray paint. The roof, door, and windows are pretty close matches but the actual color of the playhouse is much more white than the smaller playhouse.
The spray paint colors we used on the smaller play house were all by rust-oleum. We used Blossom White for the walls, Stone Gray for the windows, Espresso for the roof, and Solstice Blue for the door.
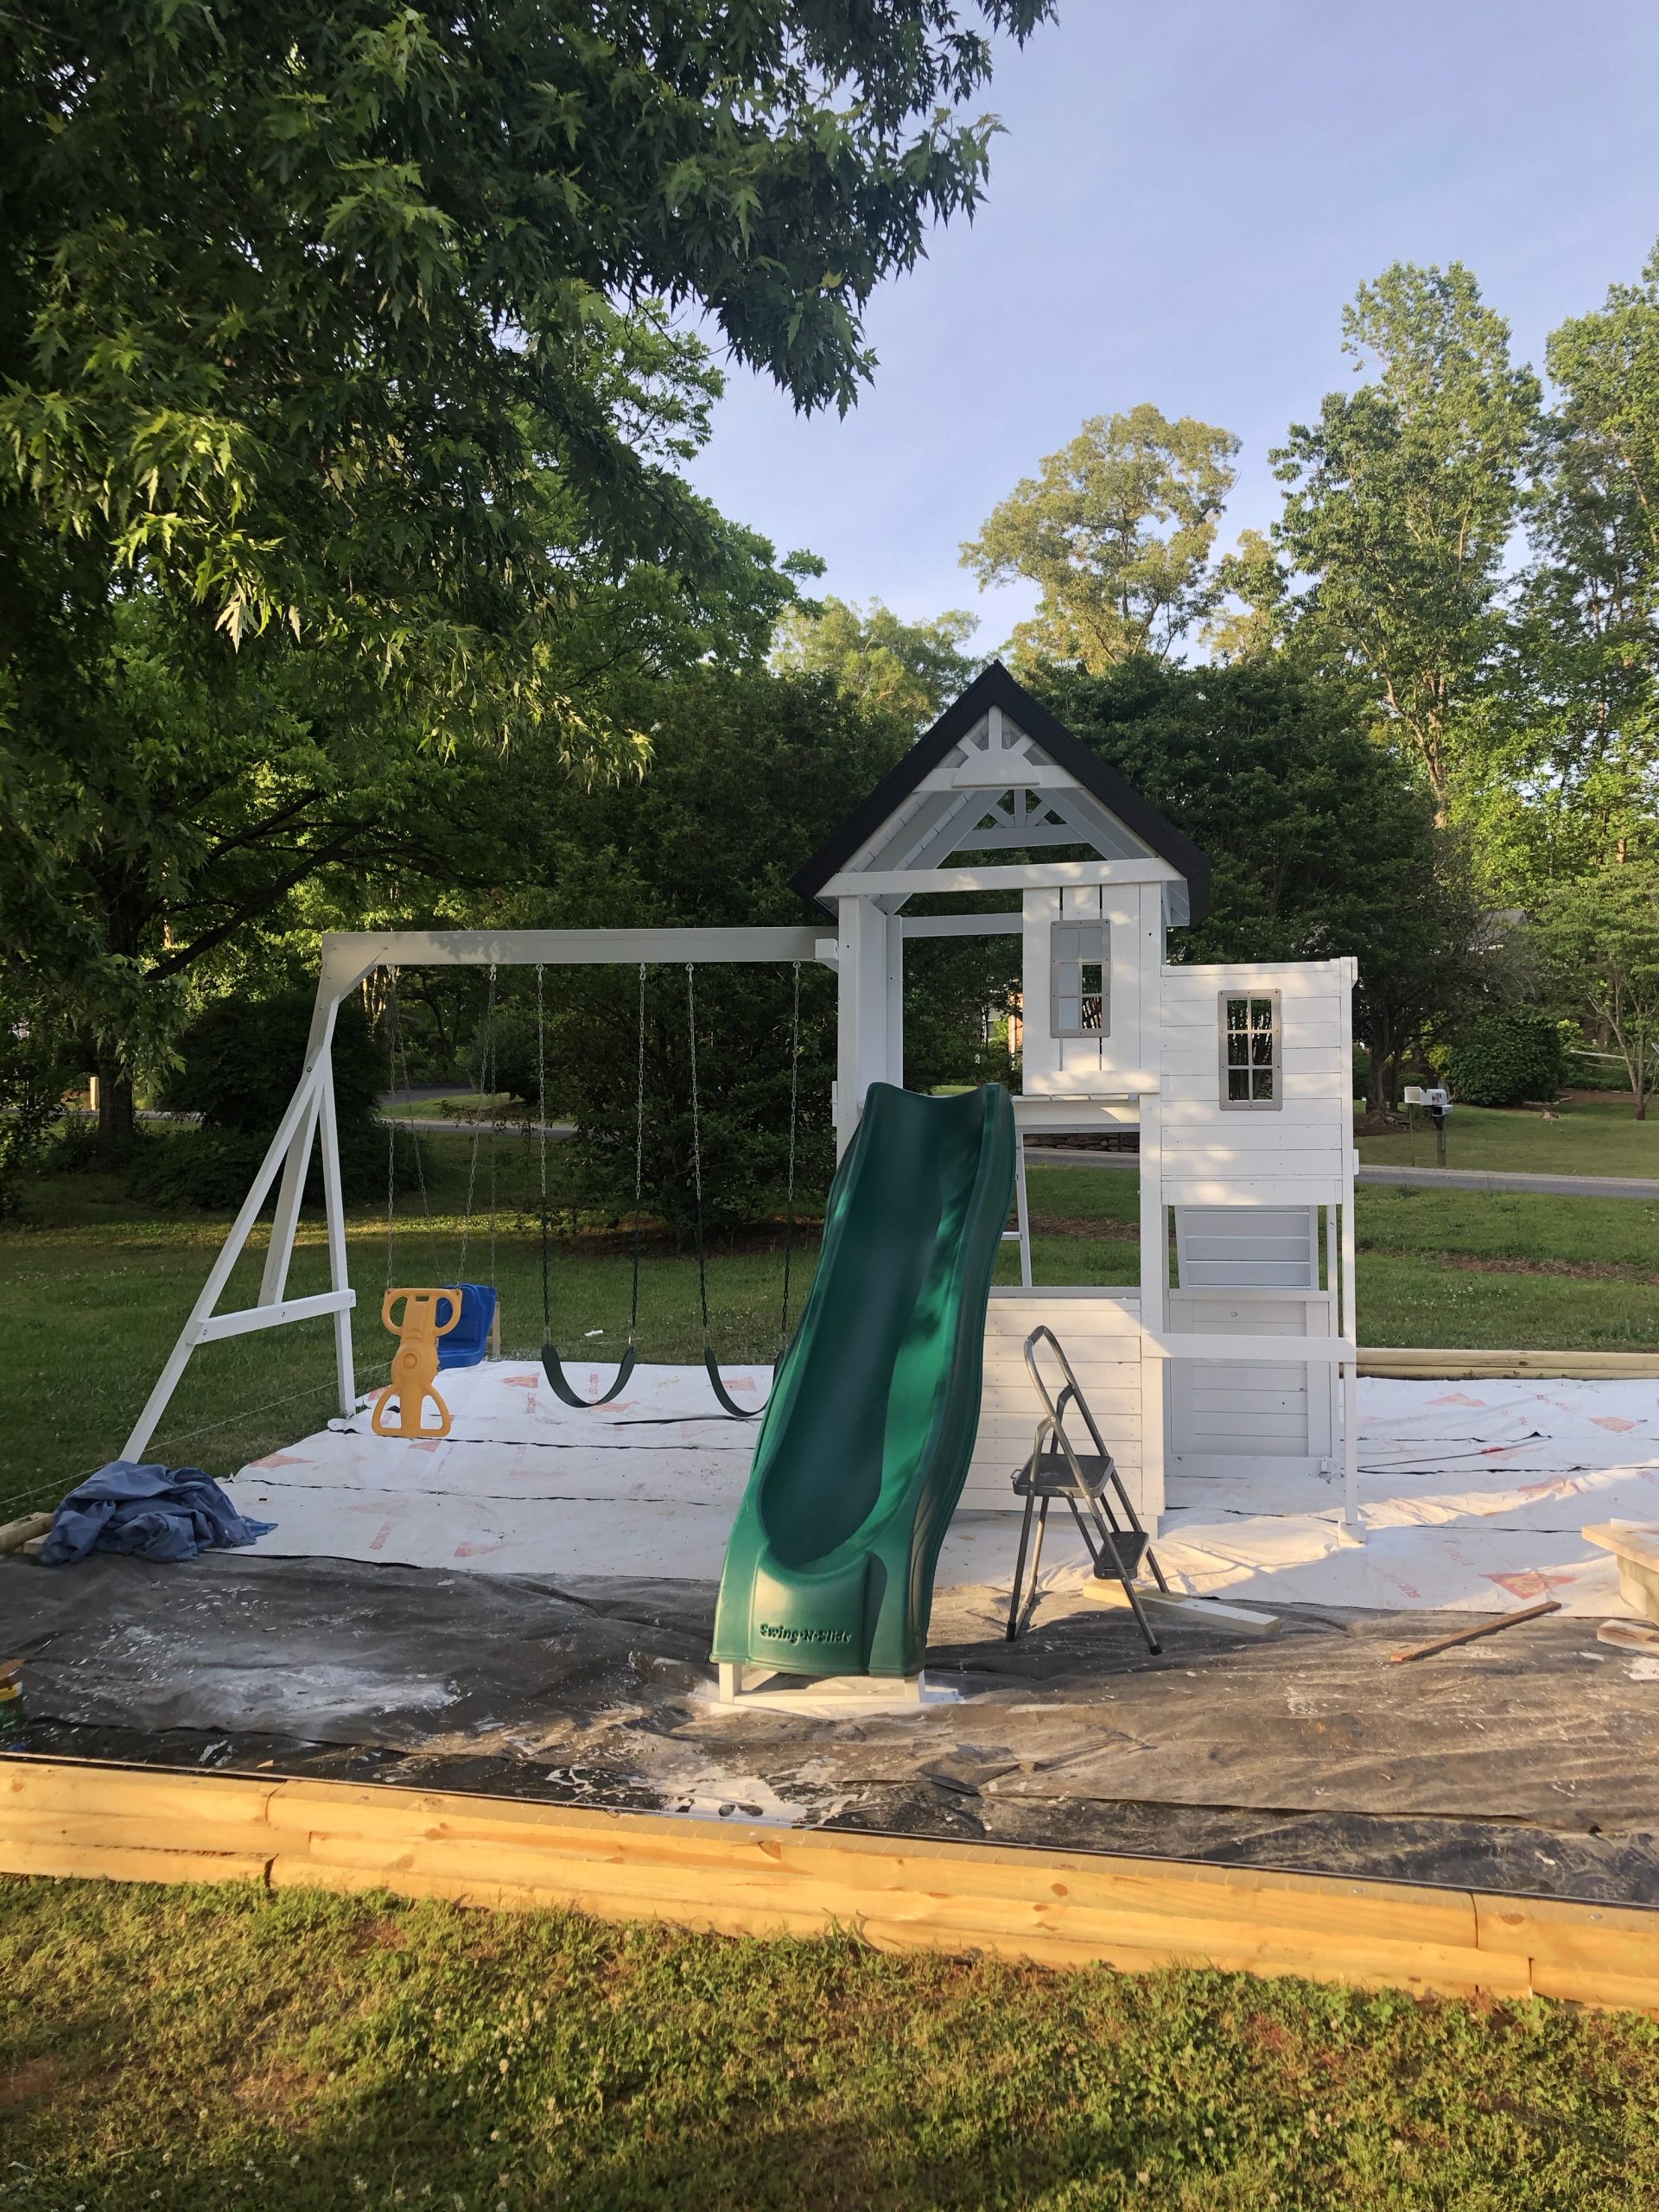
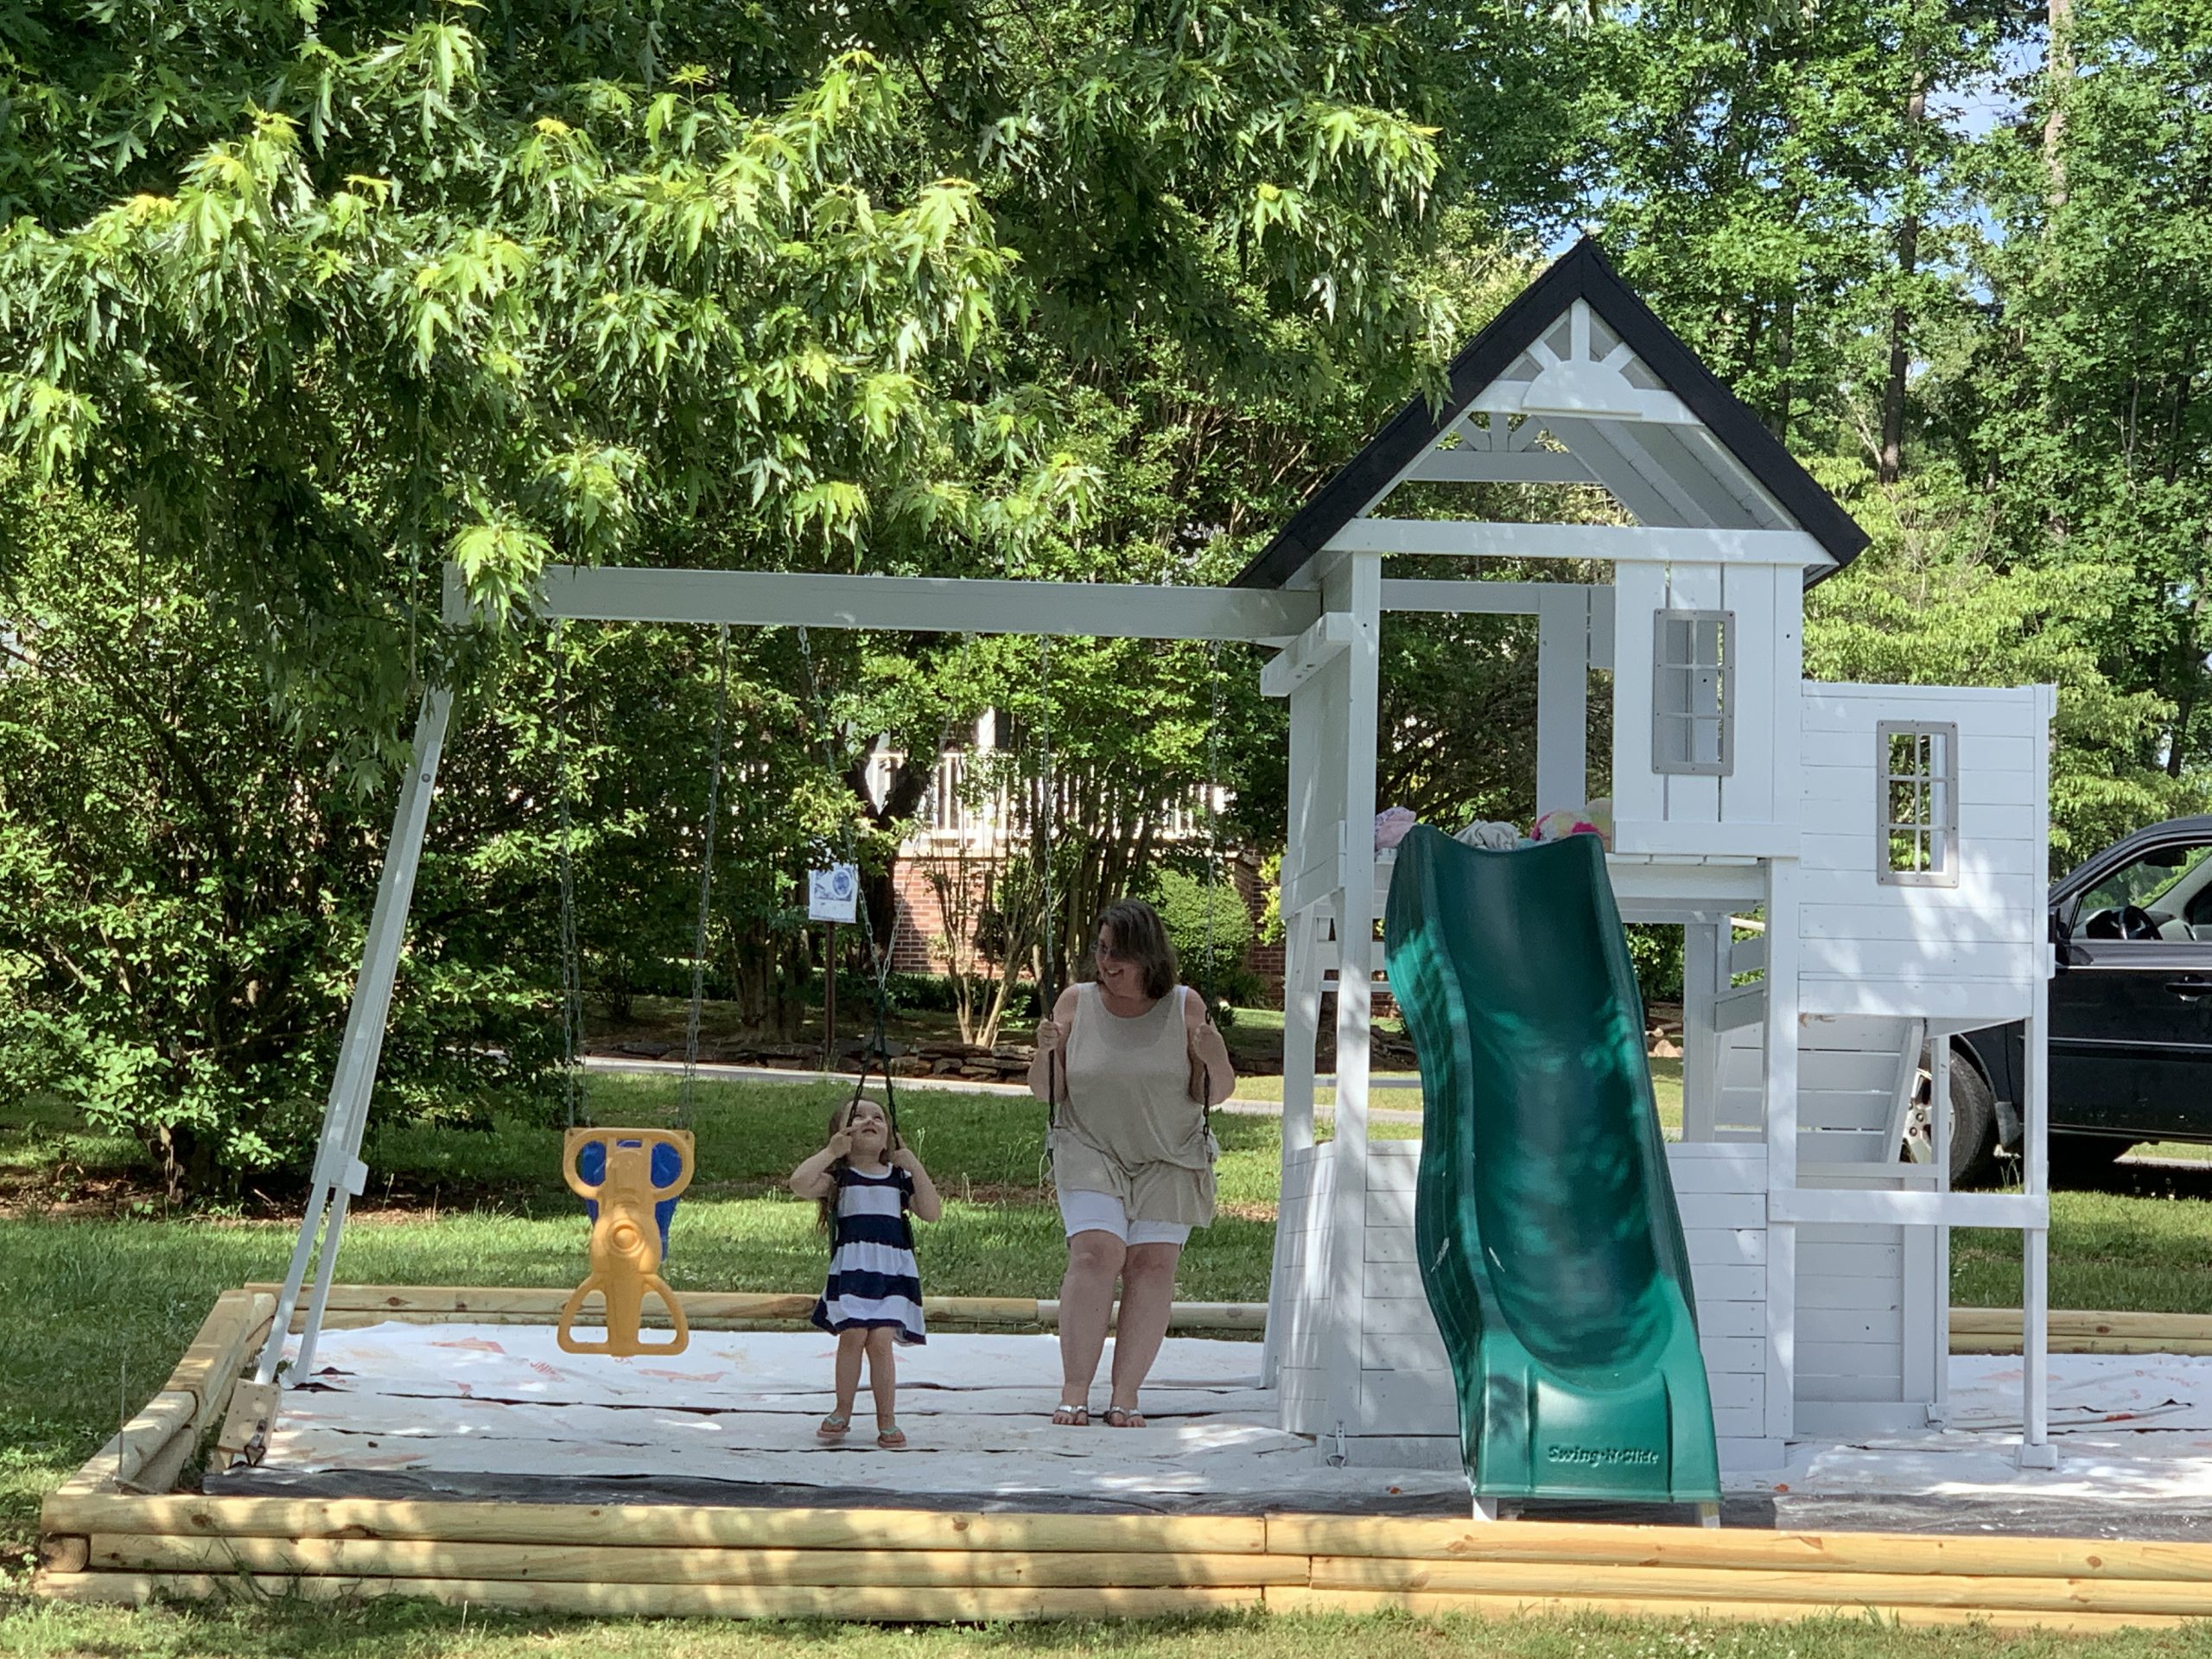
The next weekend (Mother’s day weekend) we assembled the swingset, put the slide and climbing wall back on, put the windows in, and touched up the paint.
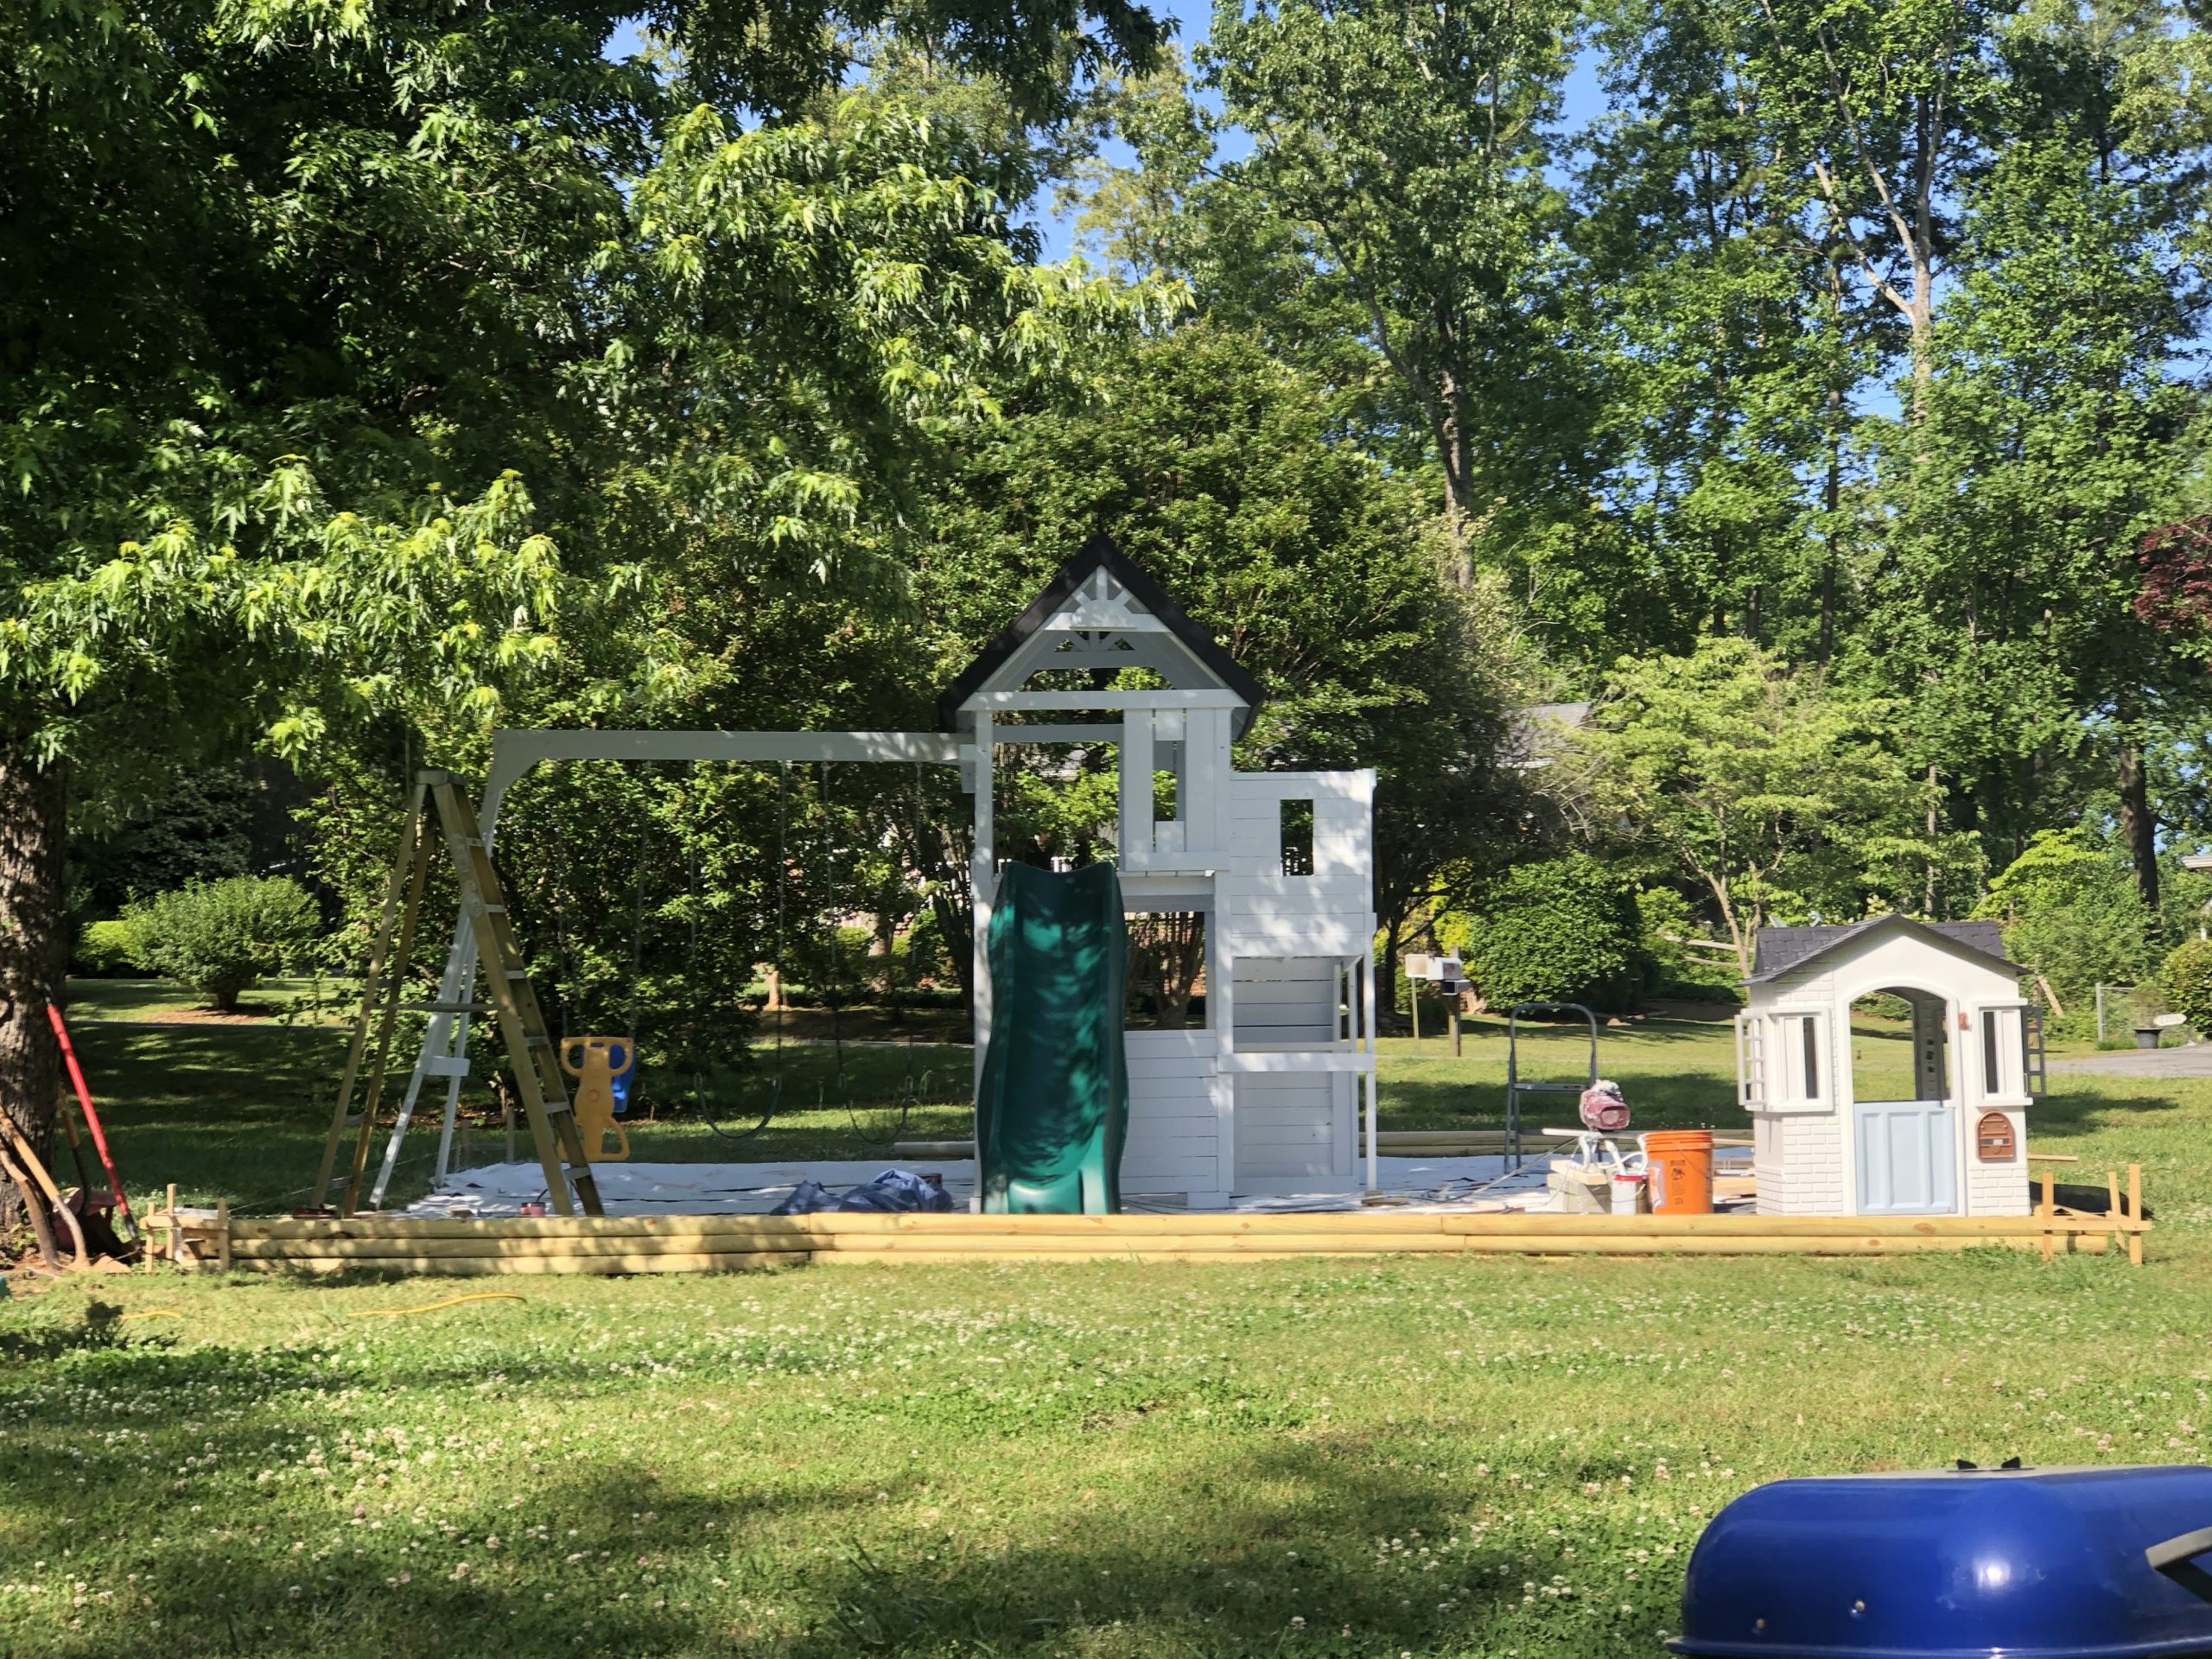
Then we leveled the playset and secured it with anchors although it was so bottom heavy with all the extra wood, it probably would have been fine.
After weeks, Baker was finally able to play on her swingset and Gammy just happened to be in town! We were in awe that Baker took to swinging so quickly after being terrified of swings her whole life.
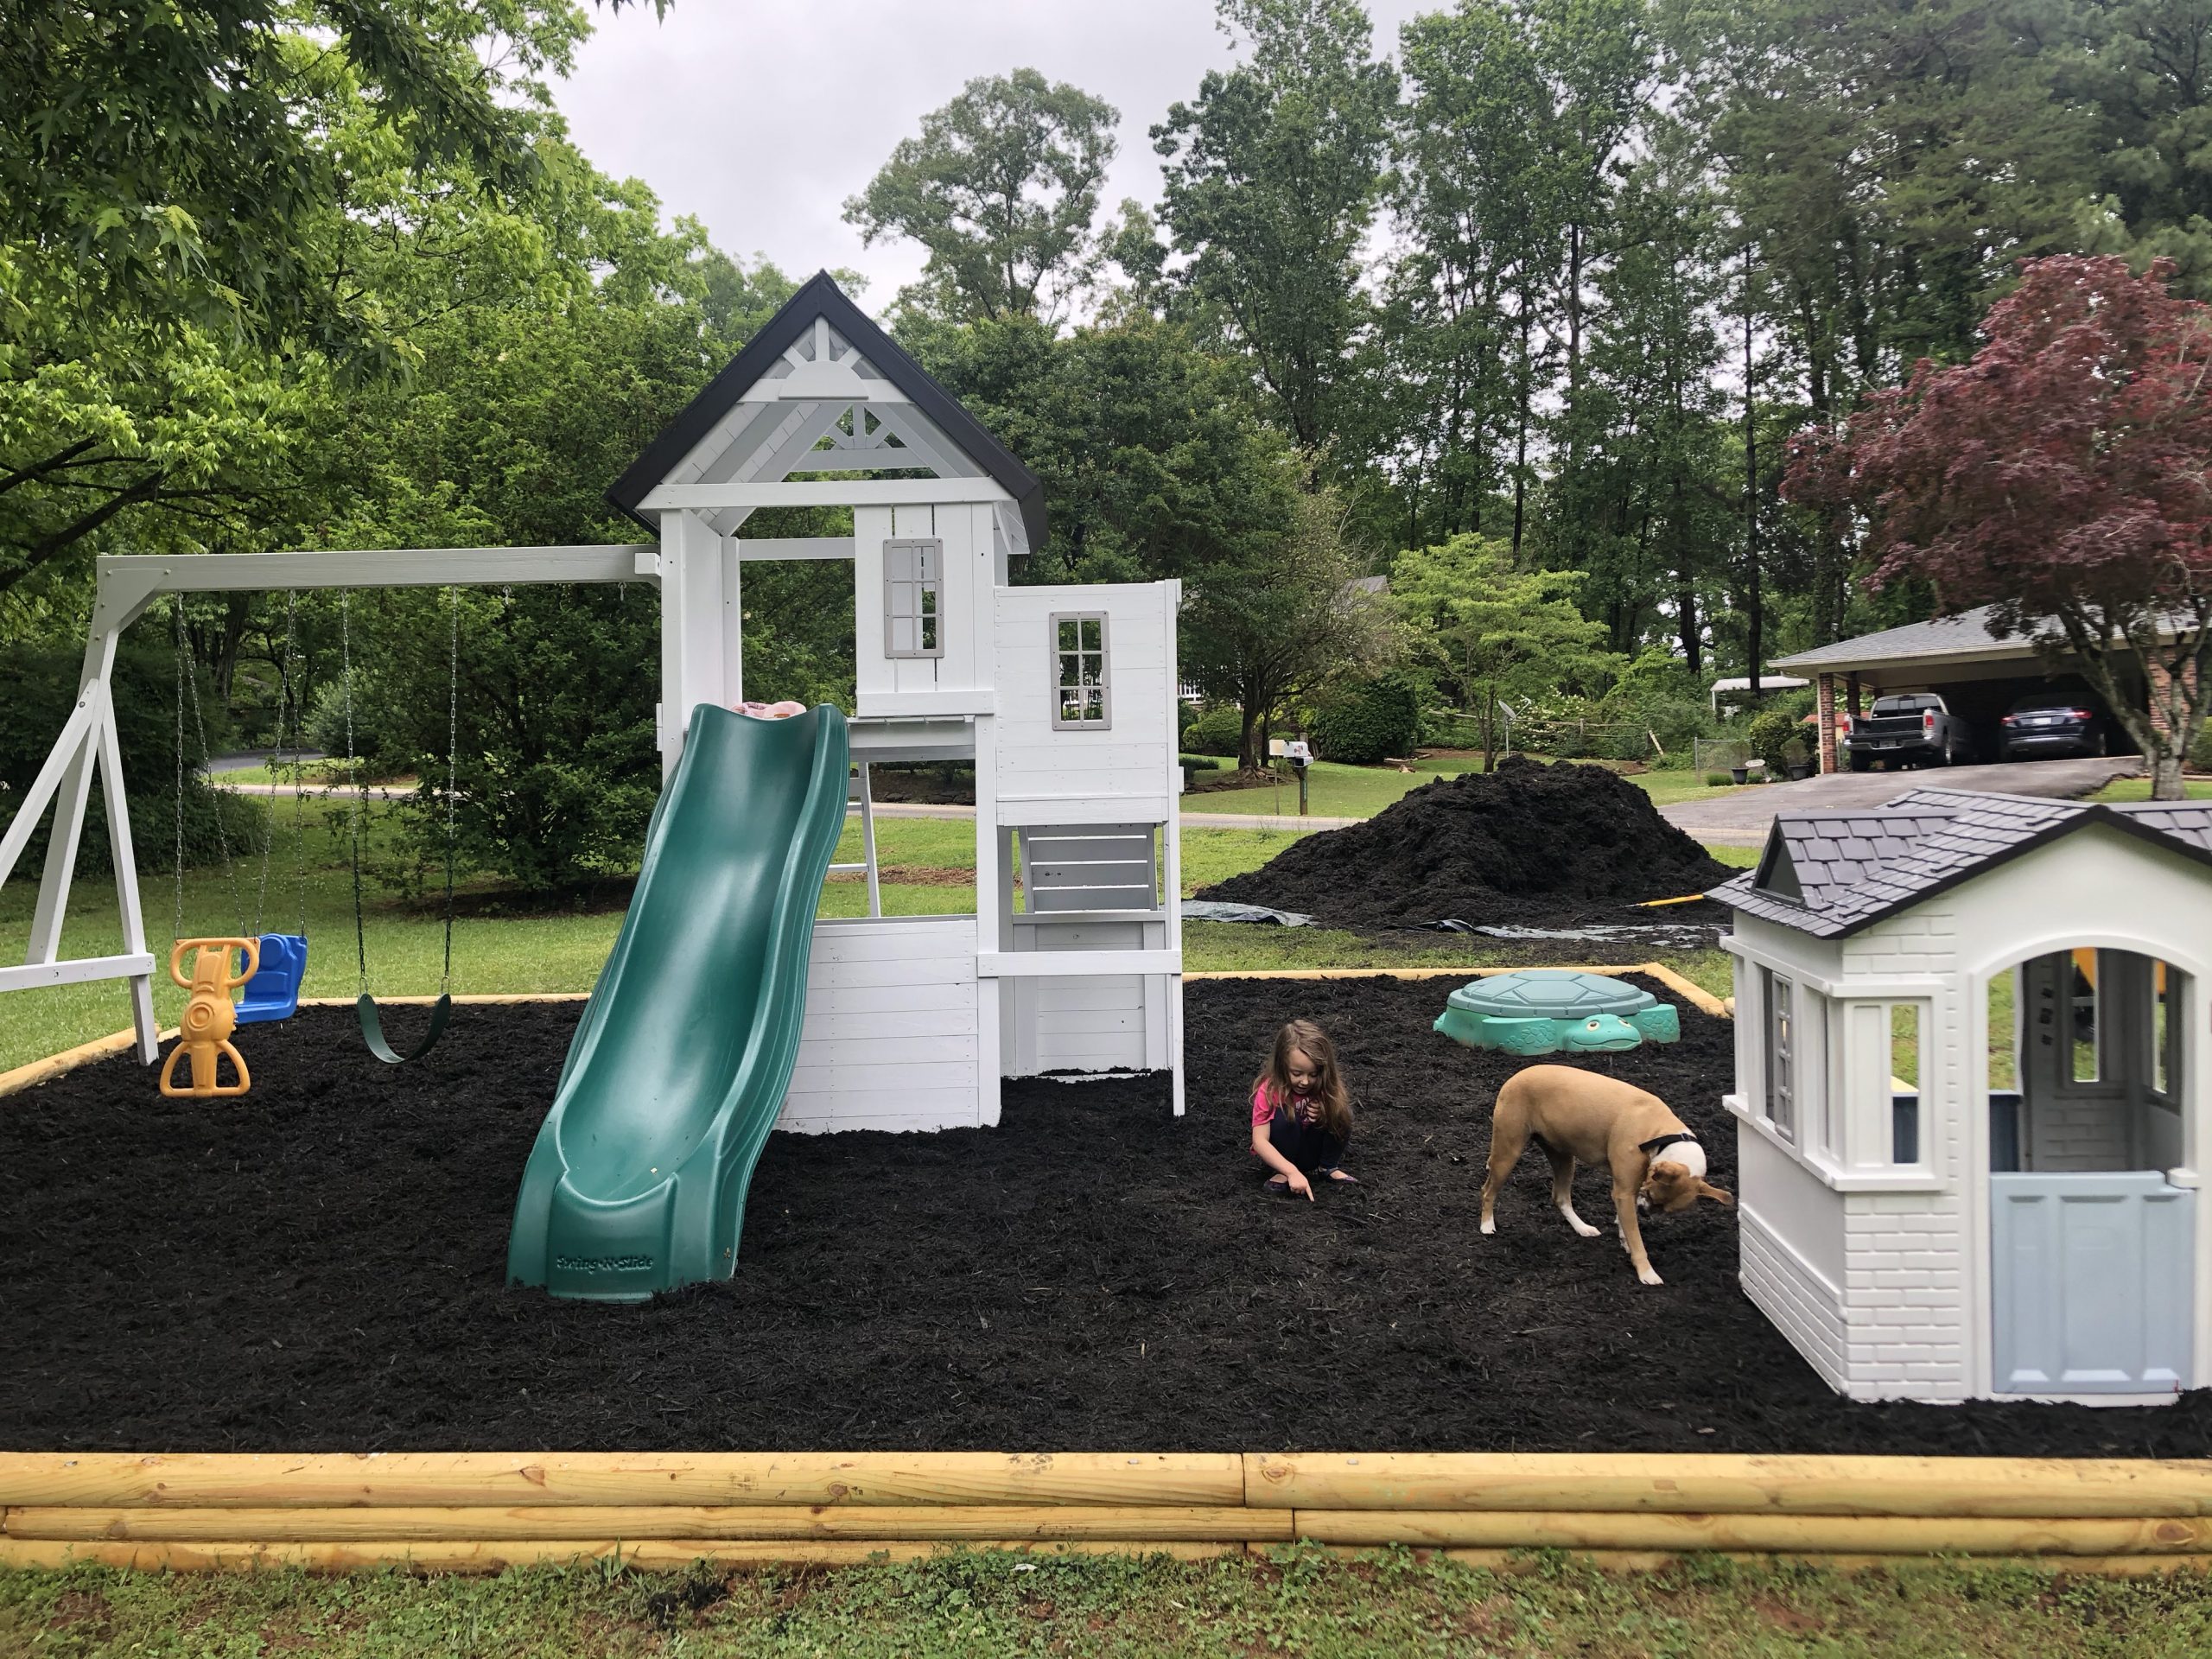
Once the mulch was delivered, we took a day and spread 10 yards of mulch in the playground area and around the yard. Whew! That was exhausting.
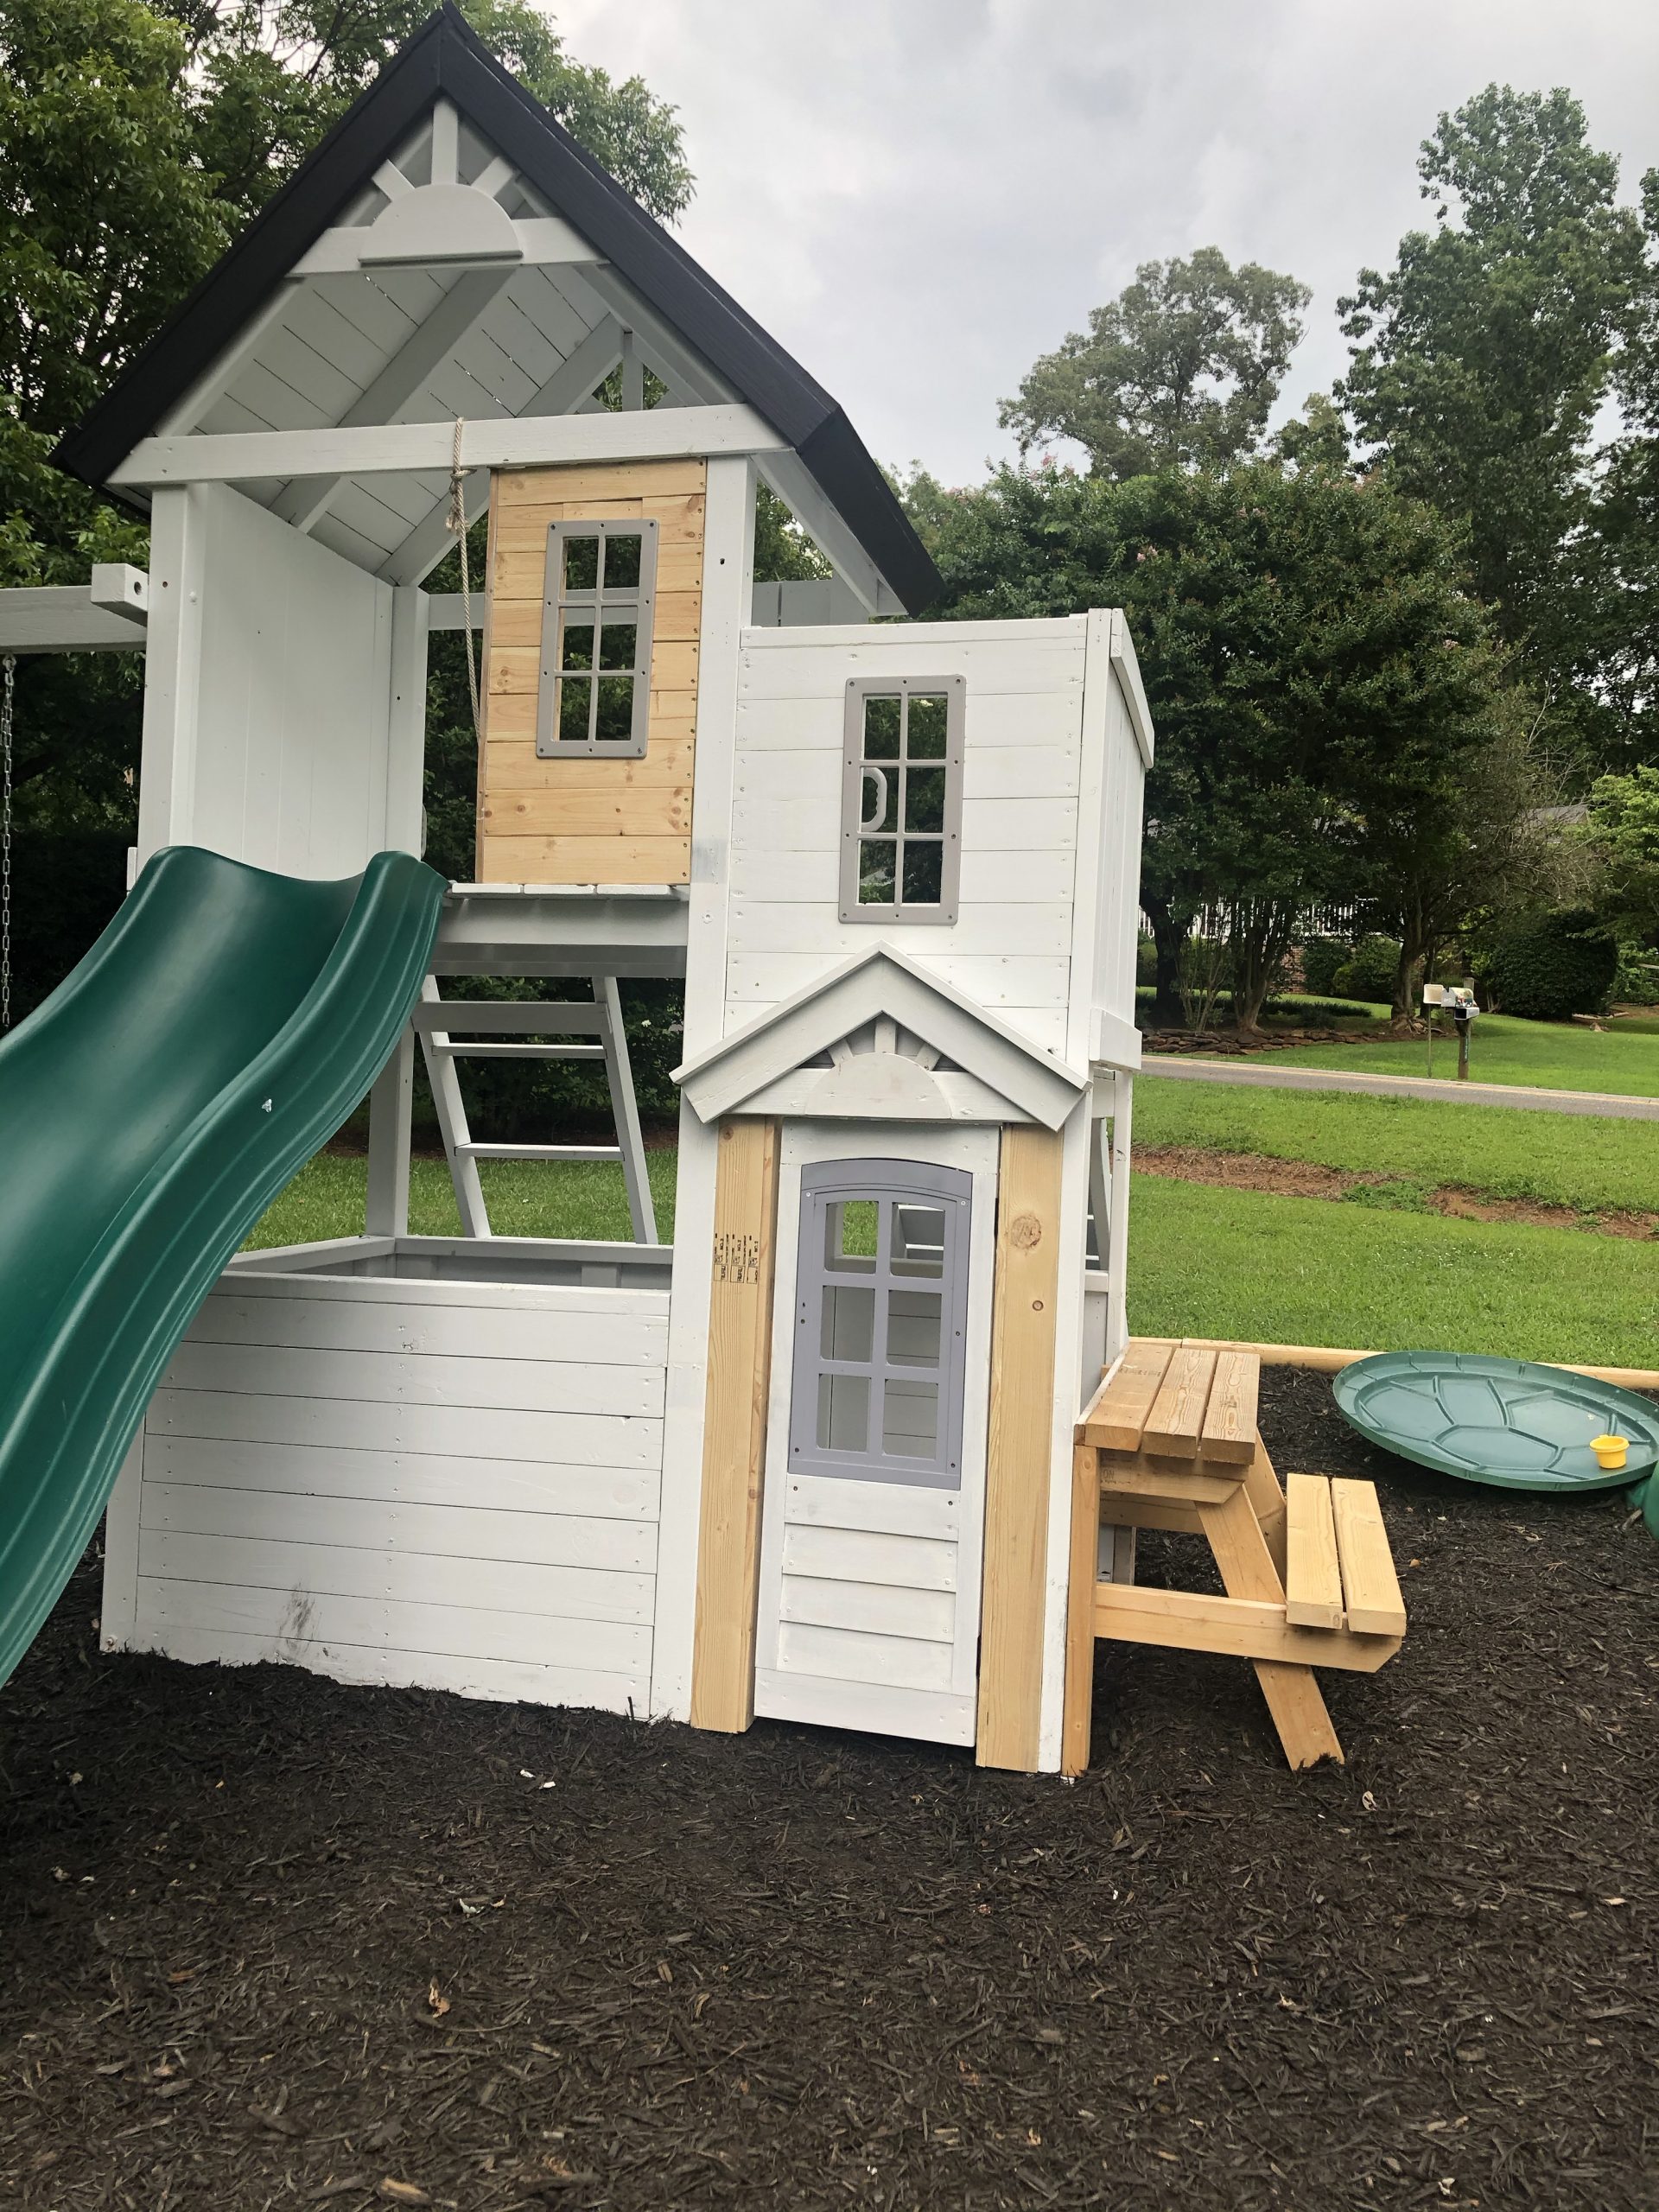
A cool story to share about the door we added to playhouse…we called a playground company that was not the same brand as this playhouse and asked if we could purchase a door because we had a hard time finding one for sale. I told them we bought the playhouse second hand and it didn’t have one. The company ended up sending us one for free. It took a month or so to be delivered but how kind that they sent us a replacement?
Once the door came in, I had Cory switch the boards around on the front of the second level (where it wasn’t painted) to match the horizontal lines around the window beside it. He built a door frame and added a new picnic table back on before painting all the unfinished areas.
Once the playhouse was completely assembled, Cory added the flower box and the lanterns to the front of the playhouse. The flowers and wreath came from Hobby Lobby.
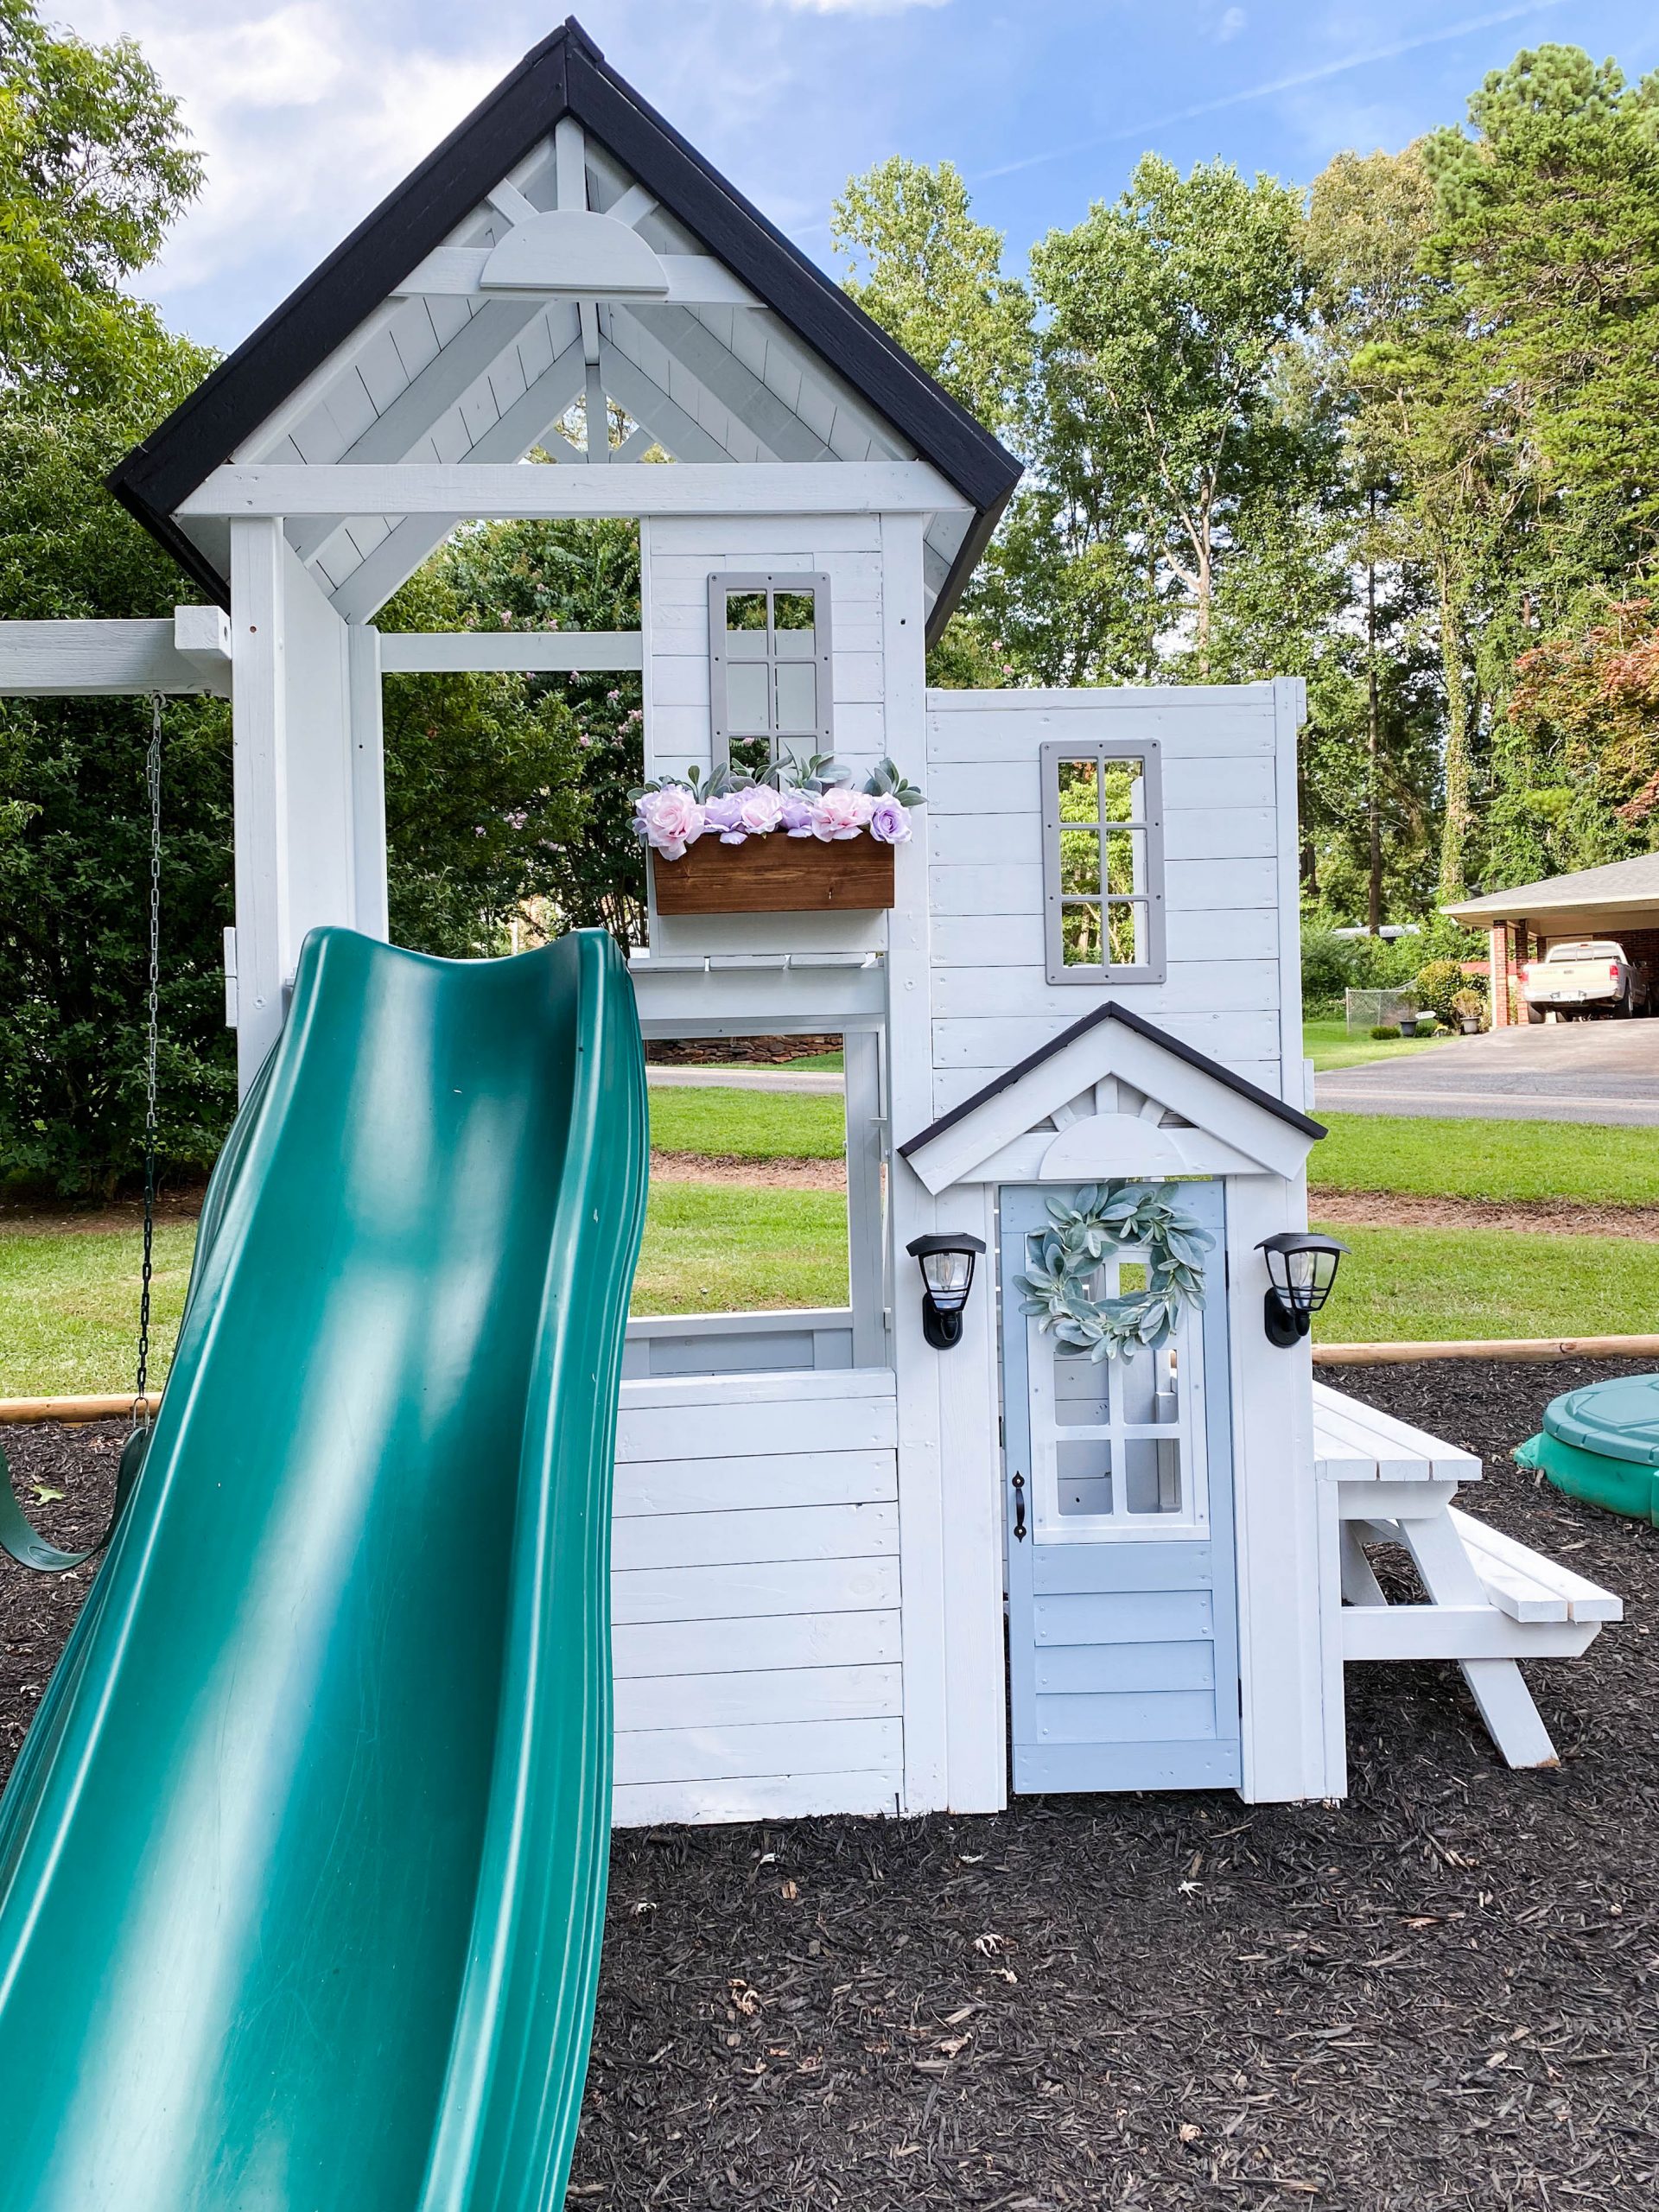
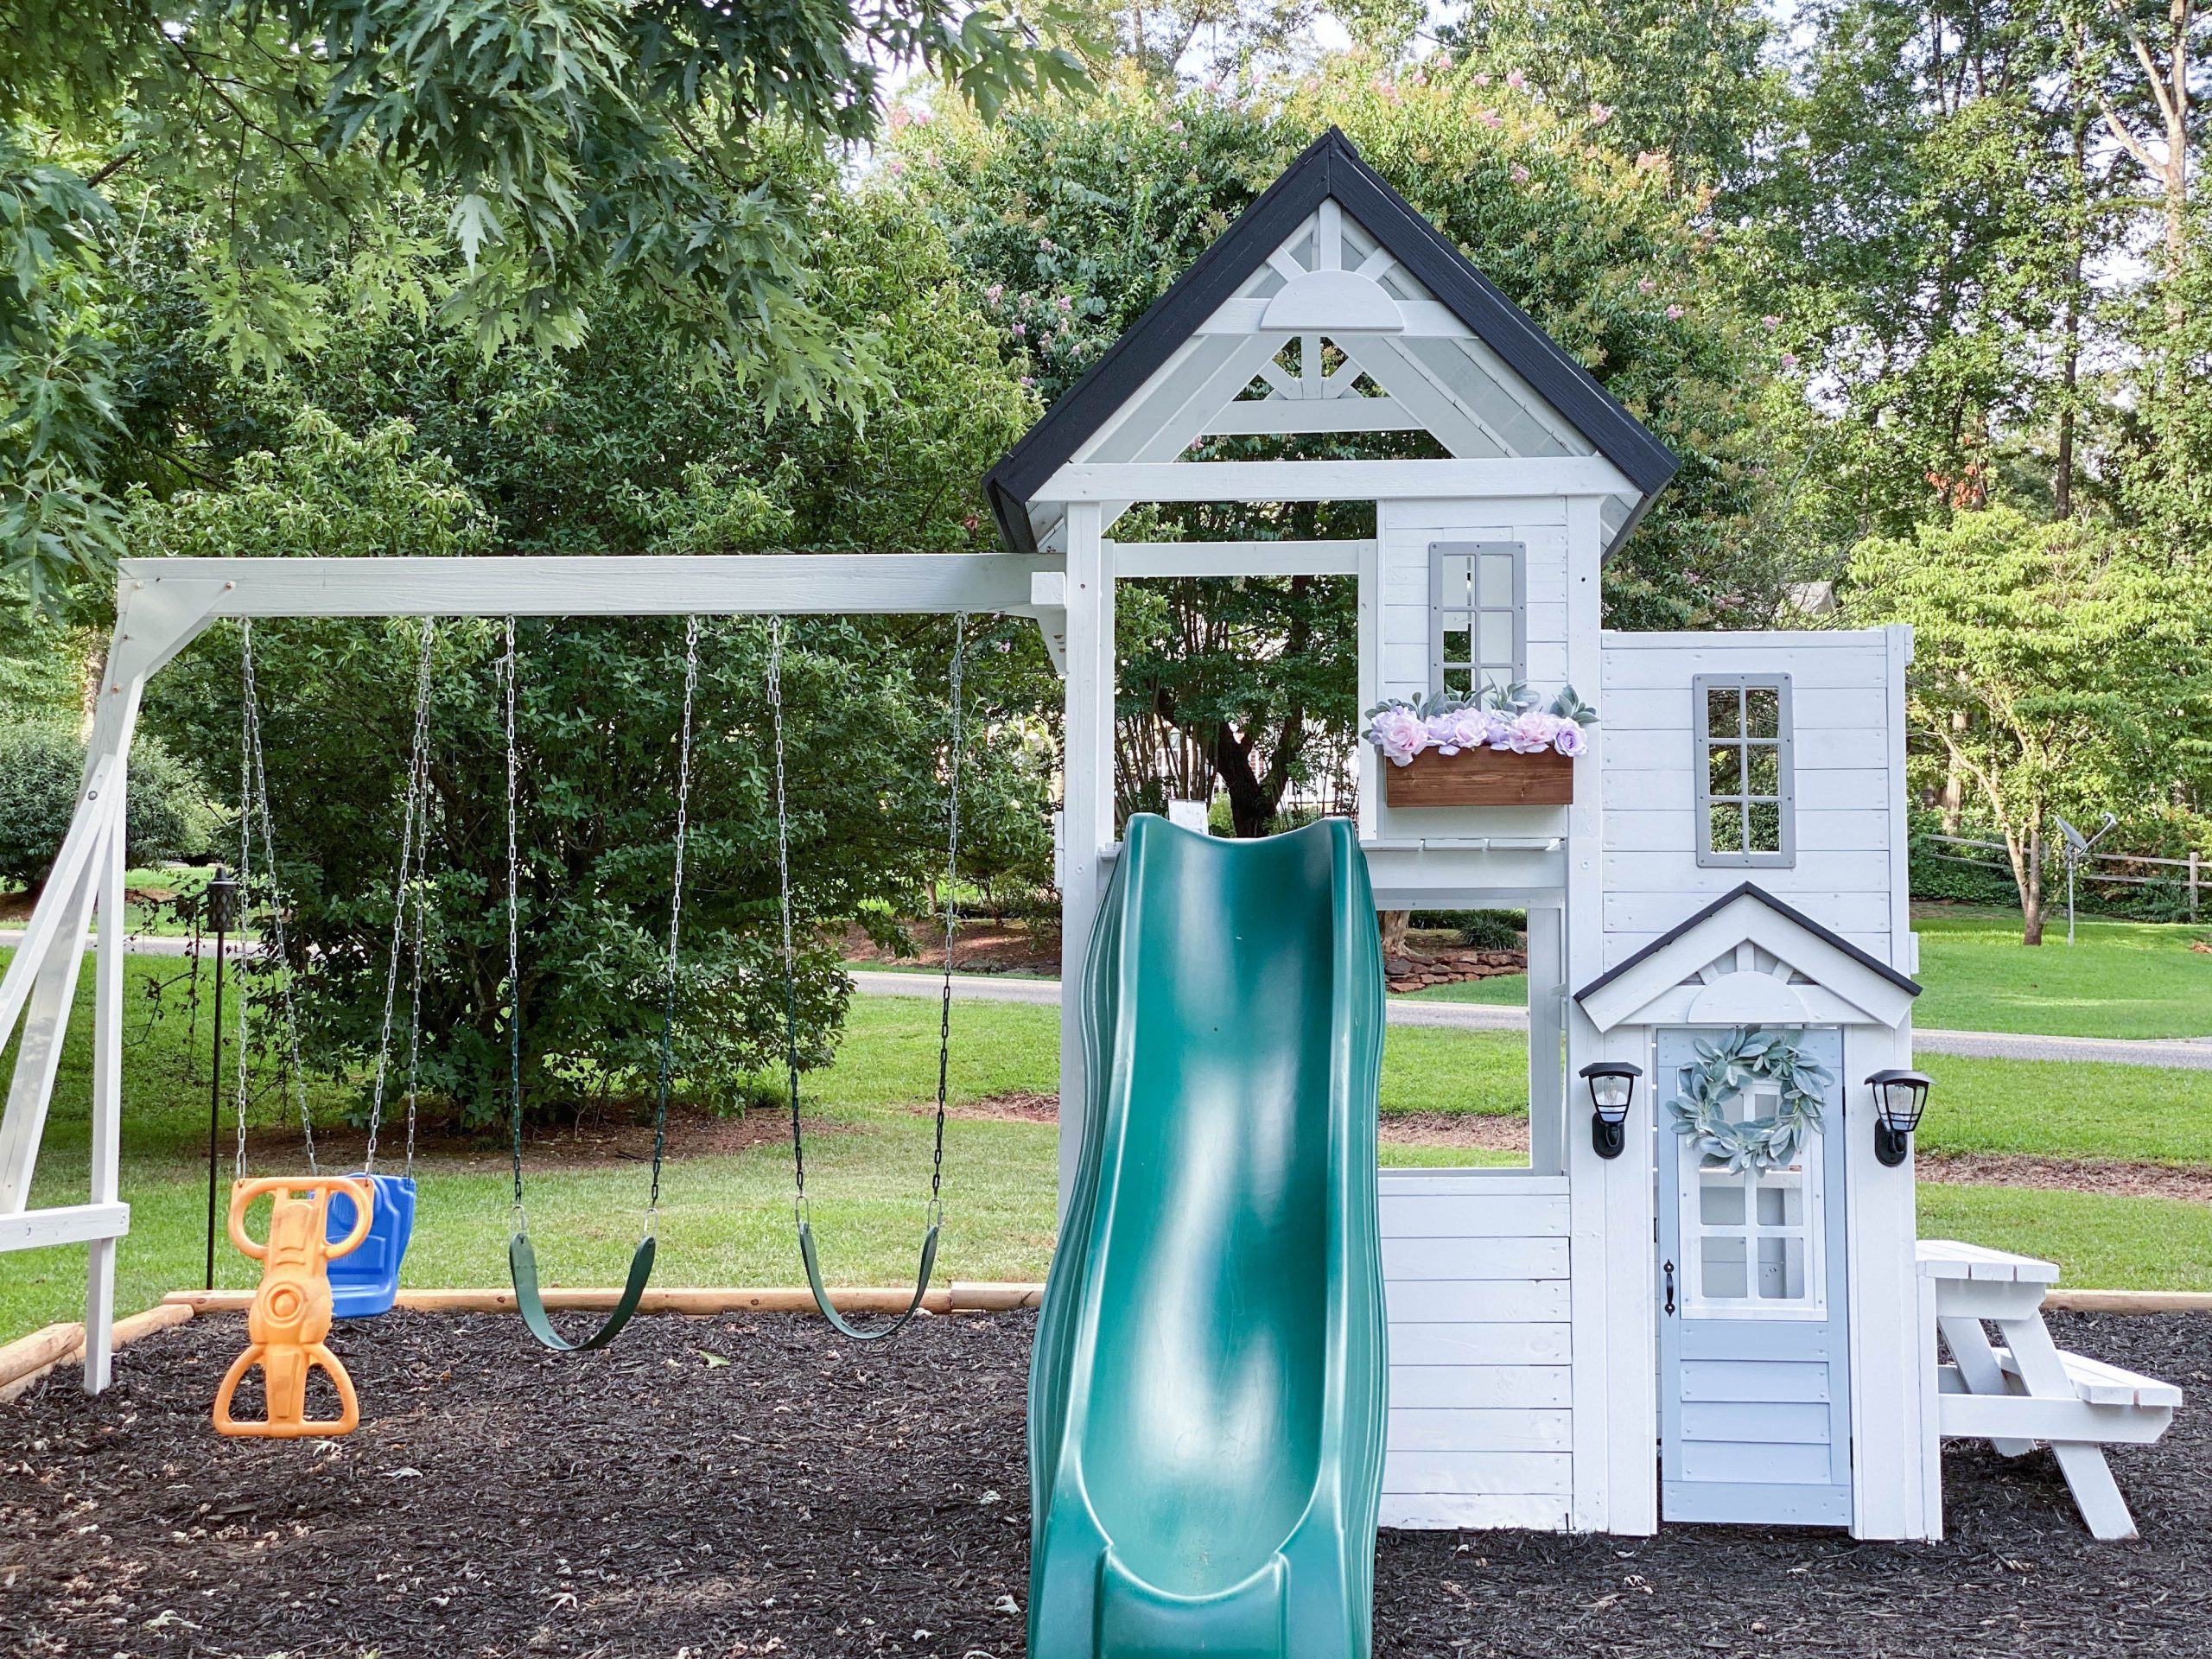
The lanterns are solar powered and came from Amazon. They add so much to the playset and we eventually wanted to add more lighting to the playground area.
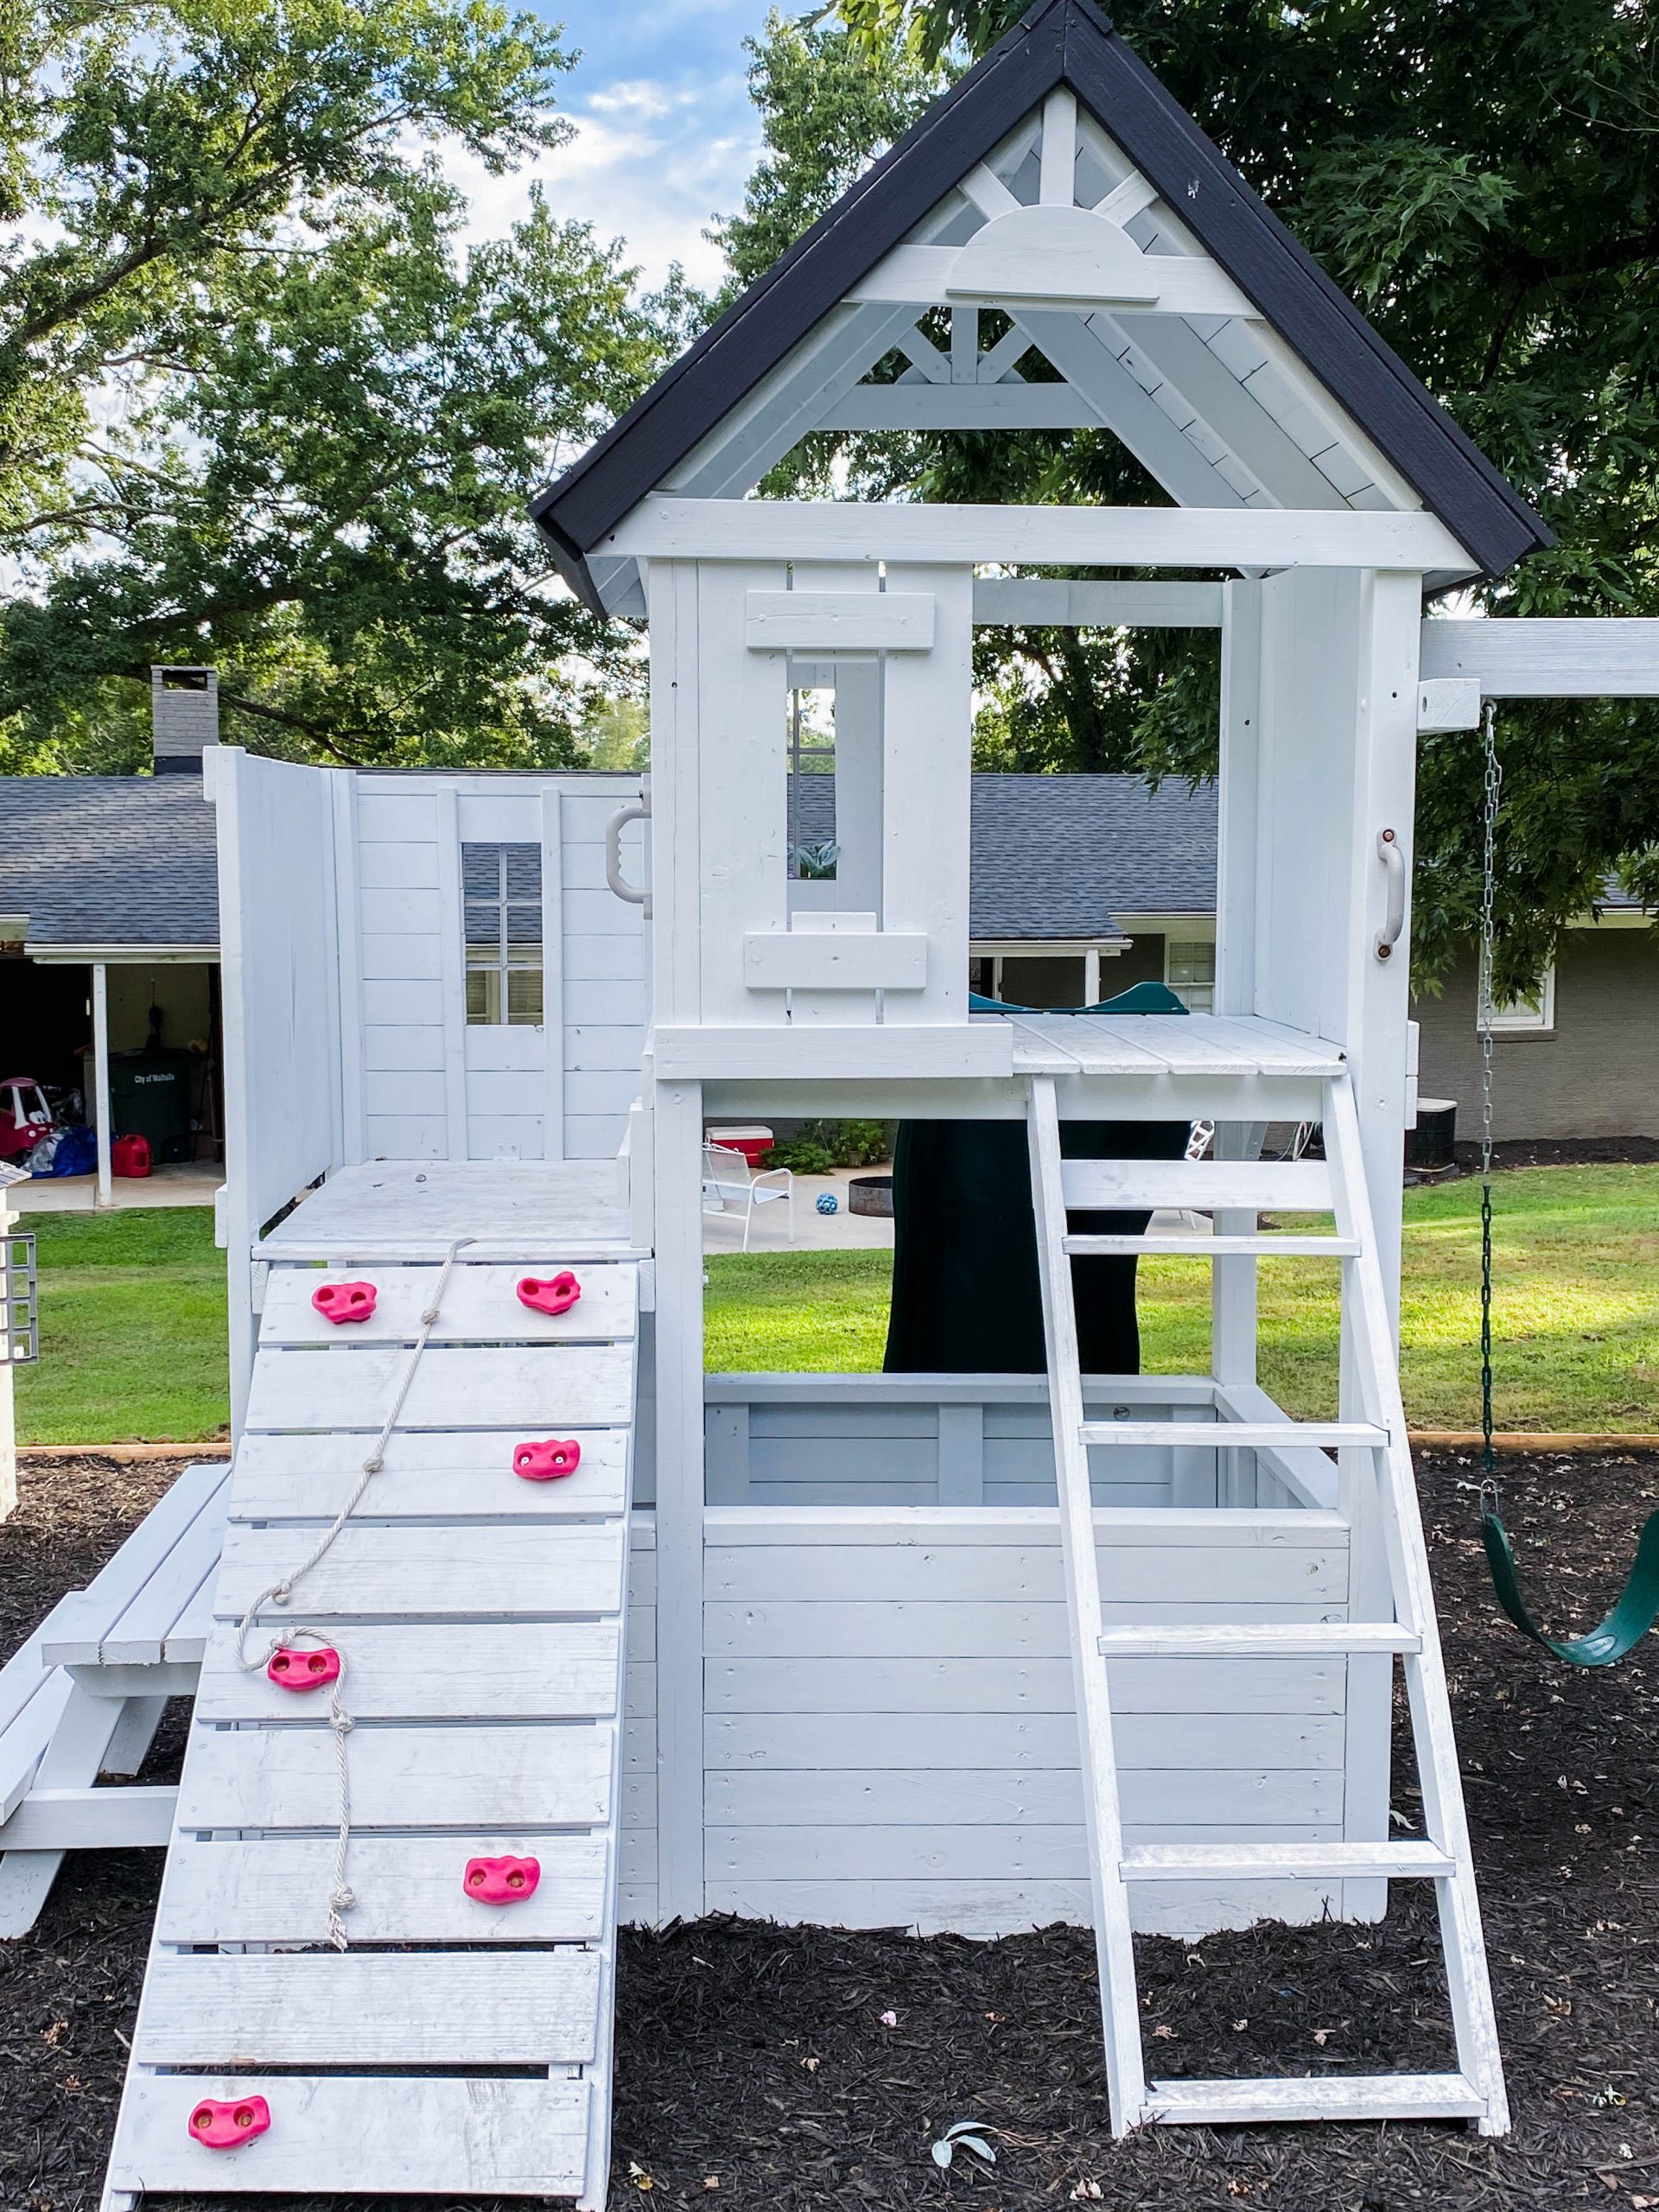
I also ordered new rocks for the climbing wall and of course, had to go with solid pink!
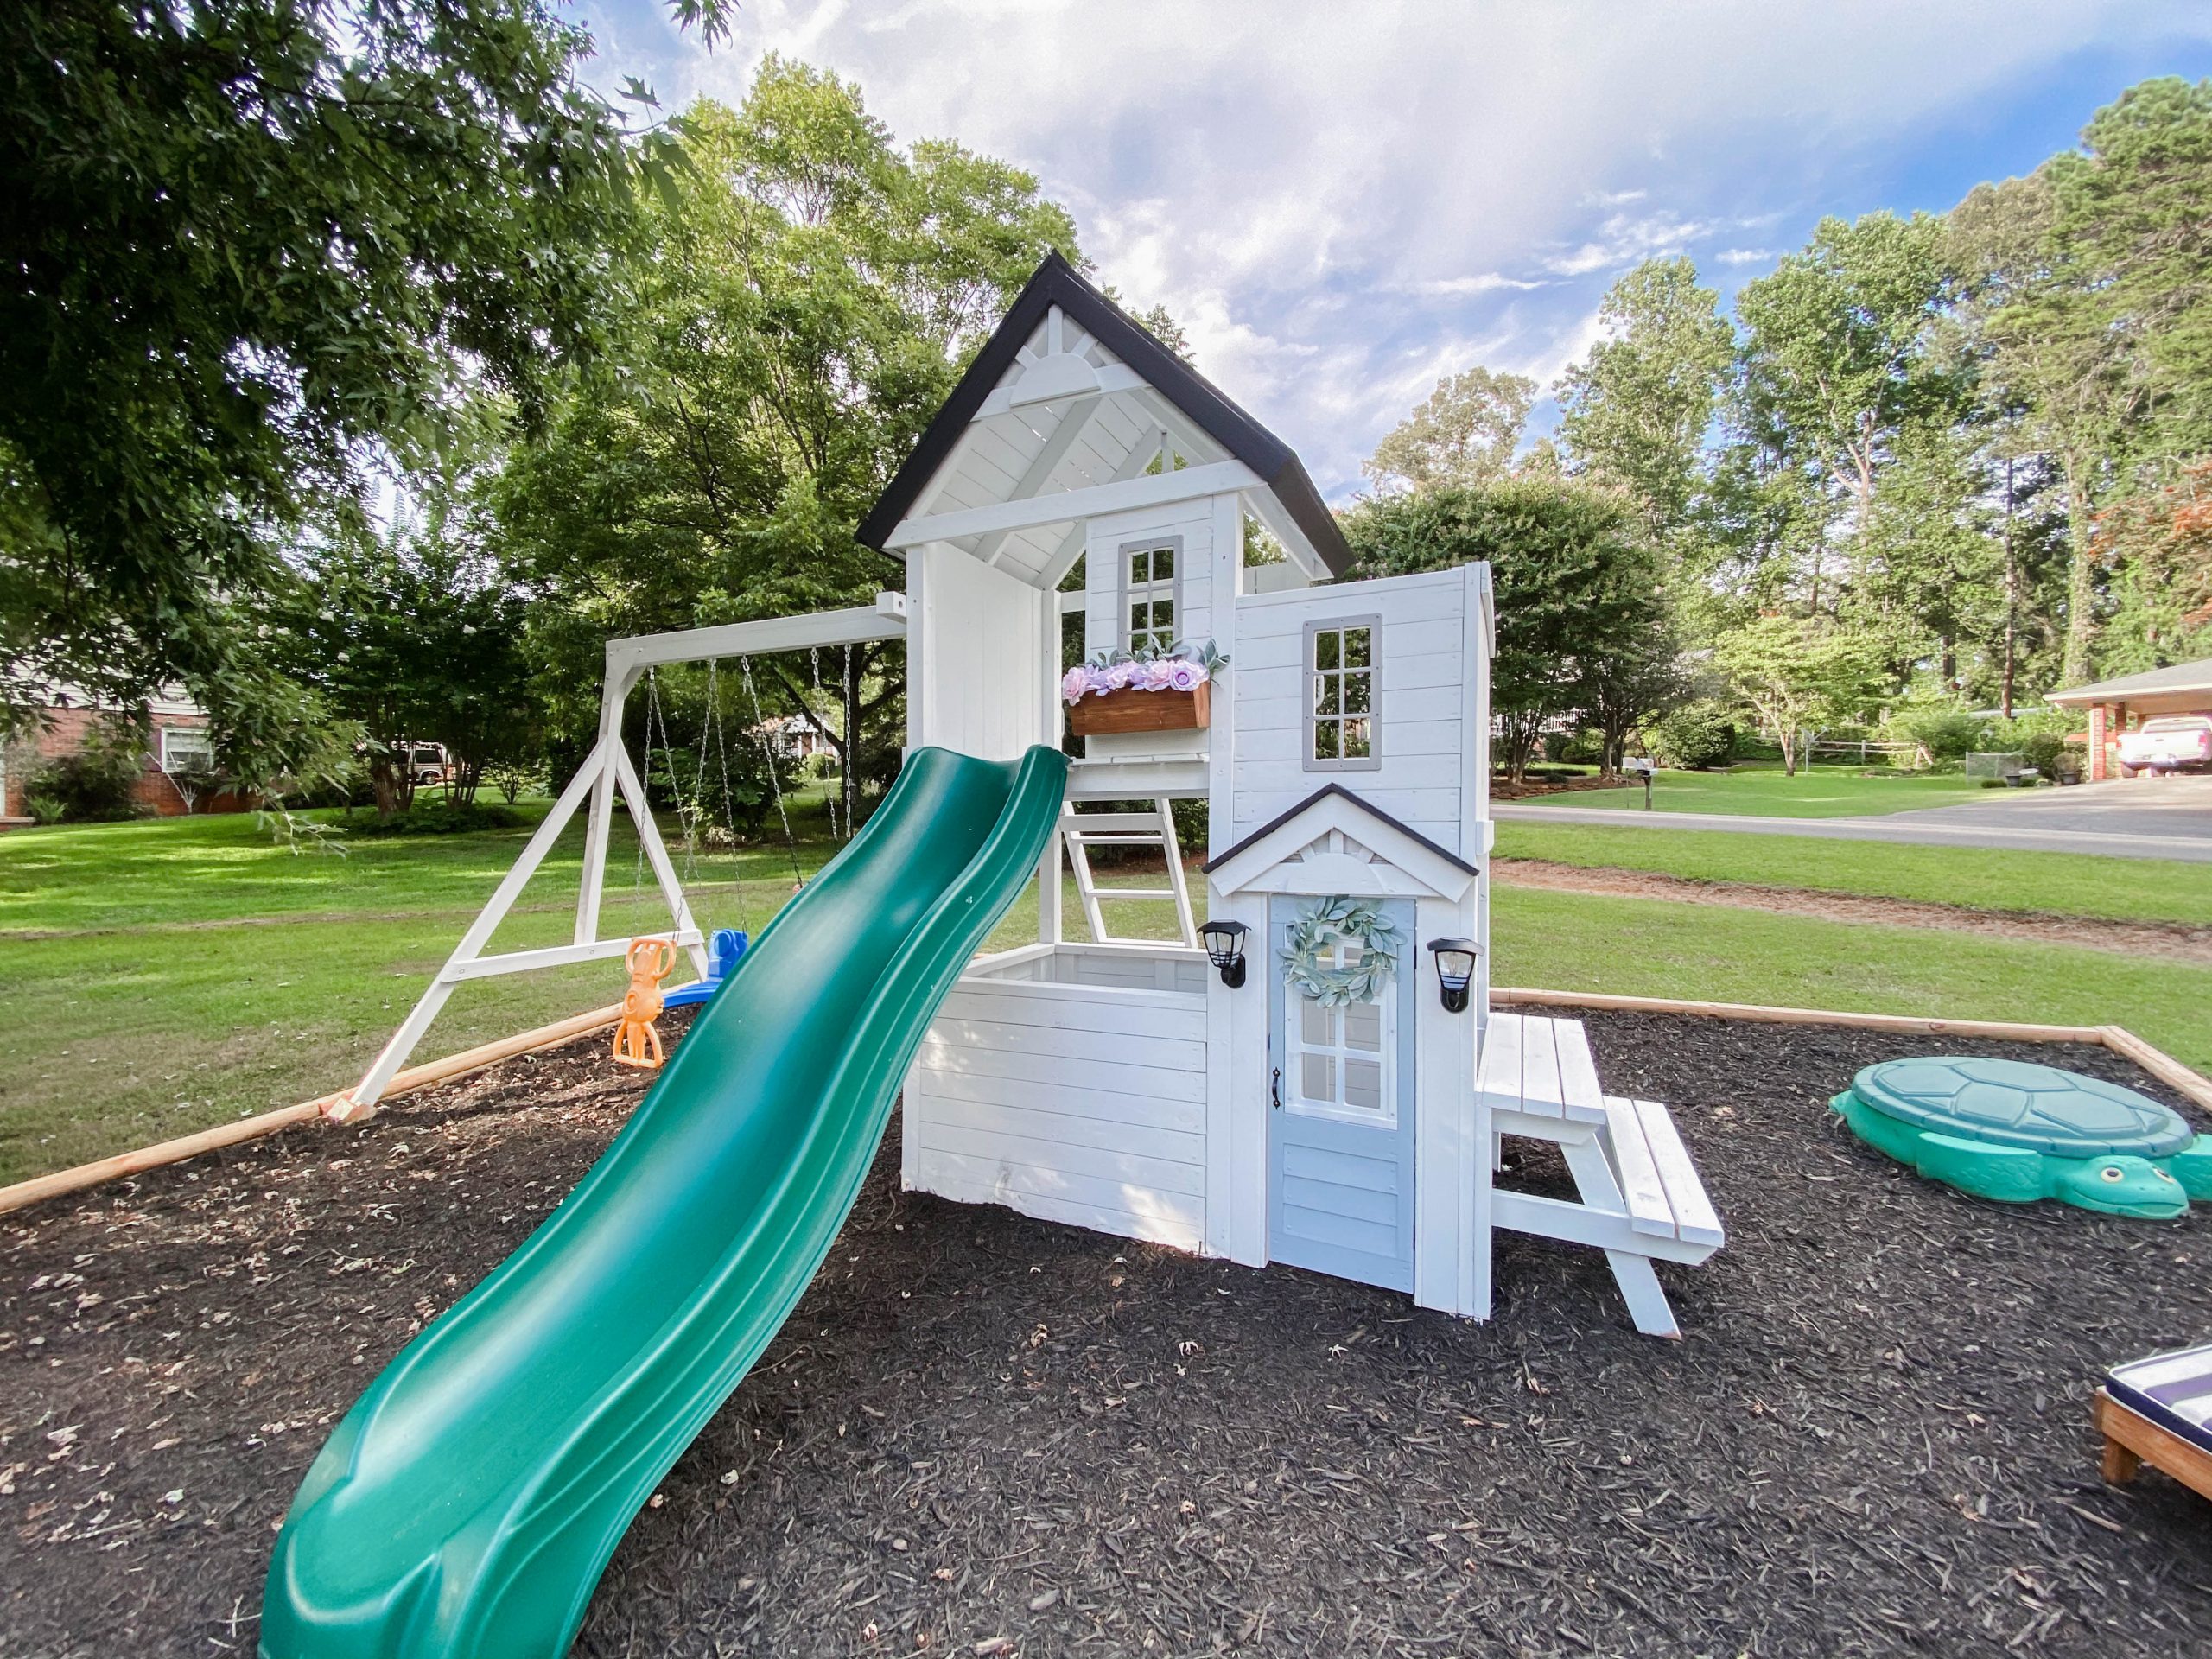
Other than touching up a few places where the fresh mulch stained the paint (I think we are fighting a losing battle there), Baker’s playground was finally finished! I completely adore the way Baker’s playhouse turned out and appreciate Cory putting so much effort and love into making it the playground of my Baker’s dreams.
Unfortunately, a few short months after we finished the playhouse makeover, we put our house on the market BUT we absolutely took the playhouse with us. This was actually the top-asked question we received when our house went on the market and we also had one buyer try to negotiate it staying. Unlike the old yard, our new yard has a very flat area for her playset to sit; however, we do plan to add timbers and mulch this spring so Cory doesn’t have to worry about cutting the grass under it. Plus, I think the playground area just sets the whole thing apart.
Can you believe the transformation this DIY playset makeover made? This might be my favorite DIY project we’ve done yet!
One Comment
Sharon
This turned out so cute! Planning to redo our swing set and we got a little playhouse recently that’s all wood so I’m planning on matching them up to each other like you’ve done. Glad you were able to take it with you to the new place!